This is part three of a three part series on adding your signature to digital files. In the first part, we discussed making a TIFF of your signature, in the second part, we added that signature to Microsoft Word. In this part, we'll use InDesign to add our signature to a PDF. We'll also learn about filling out forms in InDesign.
If you want to play along with the home game, you can download the signature, a sample Microsoft Word contract and a sample PDF contract by clicking the links.
For this step, you'll need:
- the digital version of your signature that we made in the first tutorial
- sample PDF contract
- InDesign*
- A rudimentary understanding of InDesign and it's most basic selection and text tools
*I'm using InDesign CS5 on a Mac. This should work in other desktop publishing programs, including Scribus, a free open source alternative, but the individual steps my vary. You can refer to your help menu or user manual for more guidance.
For the sake of simplicity, I'm going to opt for the least technical explanations, I can. Most steps have a keyboard shortcut equivelent, but I'll tell you where the option is in the menus, and I will describe tools by how they appear, not necessarily by their technical name.
Open InDesign and create a new document. You will want to have the same number of pages as there are in your contract. Set your margins to 0 and make sure your pages are the same size as your contract. Contracts from Europe will likely be on A4 sized pages. Contracts from North America will likely be on Letter sized pages. That's pretty much the extent of my default paper size knowledge. Since you don't need to print anything out, it doesn't matter, your digital file can support either or both sizes, if you like.
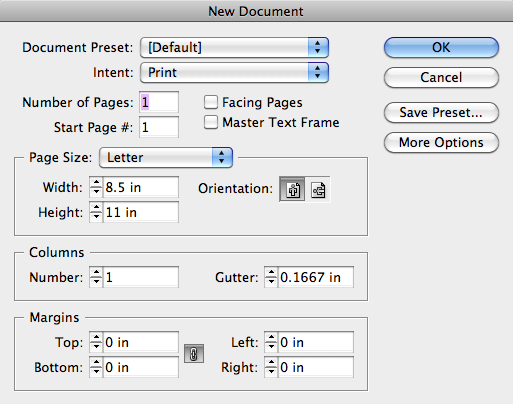
New document dialog box
The next step is to place your PDF. Go to FILE | PLACE and navigate to the PDF of your contract.
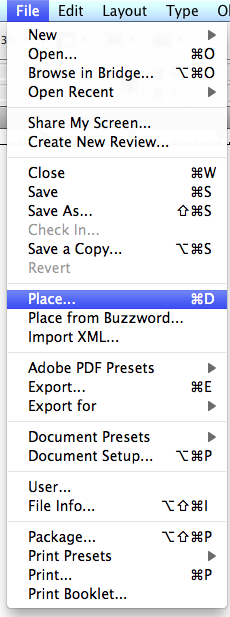
File | Place
IMPORTANT: click the SHOW IMPORT OPTIONS check box before proceeding.
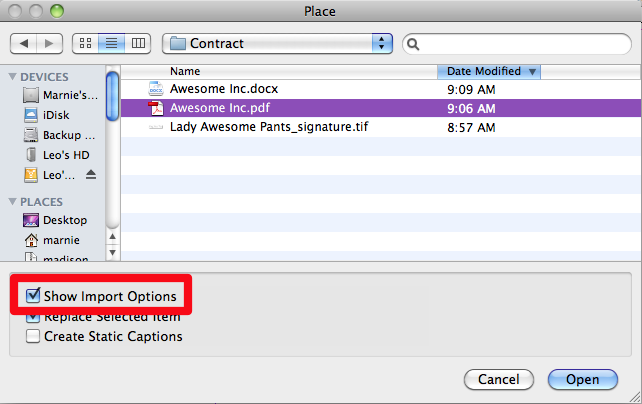
Show Import Options
This will bring up a set of import settings. Choose to import ALL the pages and set the "Crop to" drop-down to "Media".
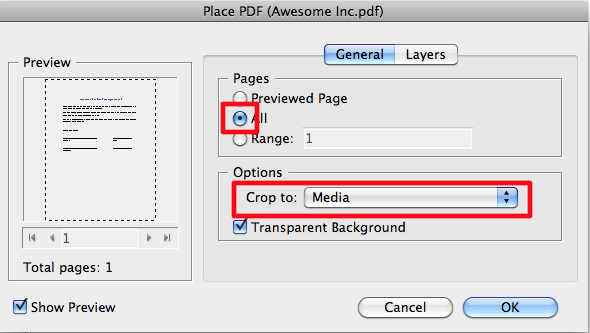
Import settings
Your cursor will change, giving you a tiny thumbnail of the first page of the contract. Click in the upper left corner of your page to place the first page of the contract. If you have multiple pages to your contract, the next page will now be loaded into your cursor and you can place it on the next page of your InDesign document. Continue this process until all pages have been added.
Contract is now placed in InDesign
Note: The default setting in InDesign is to show a low resolution preview of the PDF in InDesign. This is not reflective of the actual quality of the file. The quality is determined by the original PDF and whatever export settings you use when you make the signed version of the PDF.
Navigate to the point in the document where your signature should appear. Go to FILE | PLACE, as we did above.
Select your signature file but turn off all the check boxes that were turned on before. We do not want import options and we do not want the signature to replace any selected images.
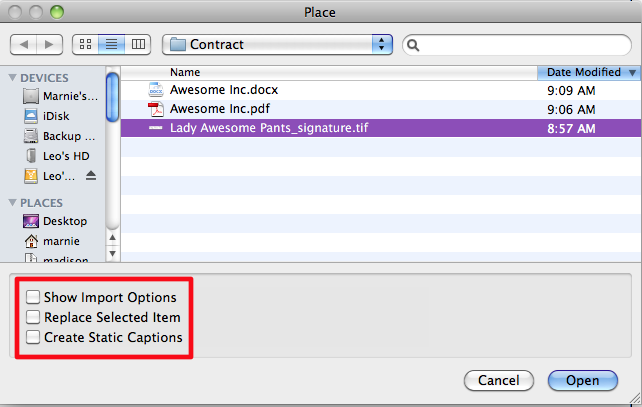
Find your signature and turn off import options
Your cursor will now be loaded with the new image. If you just click, anywhere on the page, the image will appear, or you can click and drag a box that matches the size you want your image to be. Either method will work but the latter will save you the step of having to resize your signature.

Place your signature
With the black arrow tool  selected from your toolbar click the signature.

Select signature
And drag it into place or nudge it with the arrow keys on your keyboard. Even though the black signature is on a white background, if you created a bitmap TIFF file, InDesign will treat any white pixels as transparent, so your descenders can dip below the signature line.
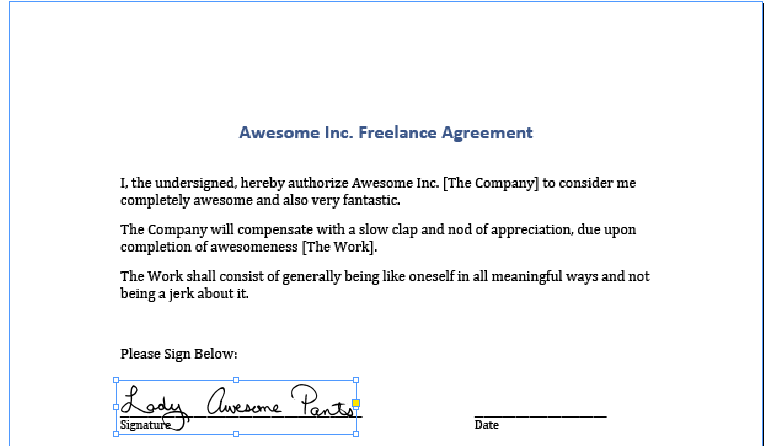
The signature in its place
That's pretty much it for adding an image. If that's all you need to do, you can skip ahead to the end, where we make a PDF to send.
If you have text to add to the page, you'll need to select your standard text tool from the toolbar. Use this to draw a box over first space requiring text.
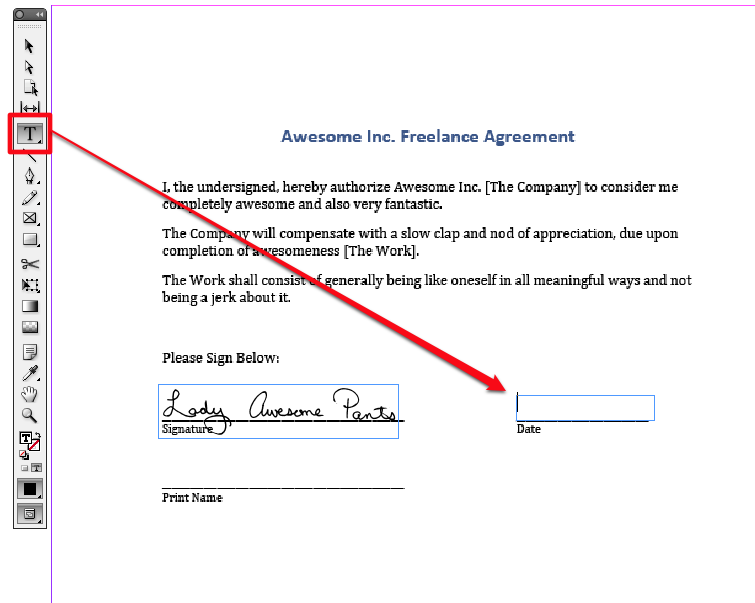
Use the text tool to create a text frame
Type in the relevant text. If, after typing in the text, the frame is blank or the text cut off and you see a little red plus sign, that means your frame is too small to hold the text. Use your black arrow to resize the frame.
With your text frame still selected, go to OBJECT | TEXT FRAME OPTIONS to modify your text frame.
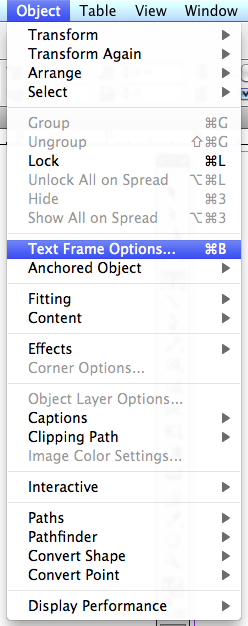
Modify the options for your text frame
The default vertical alignment is TOP. From the drop-down, choose BOTTOM. This step is totally optional but it makes it easier to align items to a visual baseline.
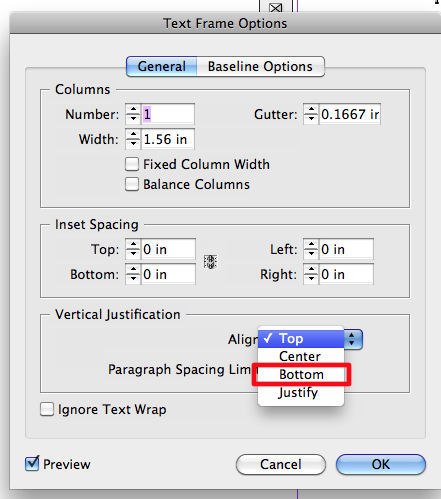
Set vertical alignment
If you were about to fill out a bajillionty page contract or job application, and you wanted to save yourself a few moments, you could use this opportunity to define the current text frame settings as your default text frame settings. That's a bit out of the scope of this tutorial, but the options for defining object styles are in the Object Styles Palette, which look a little like this.
The vertical alignment change will push your text to the bottom of the text frame. It will look something like this.
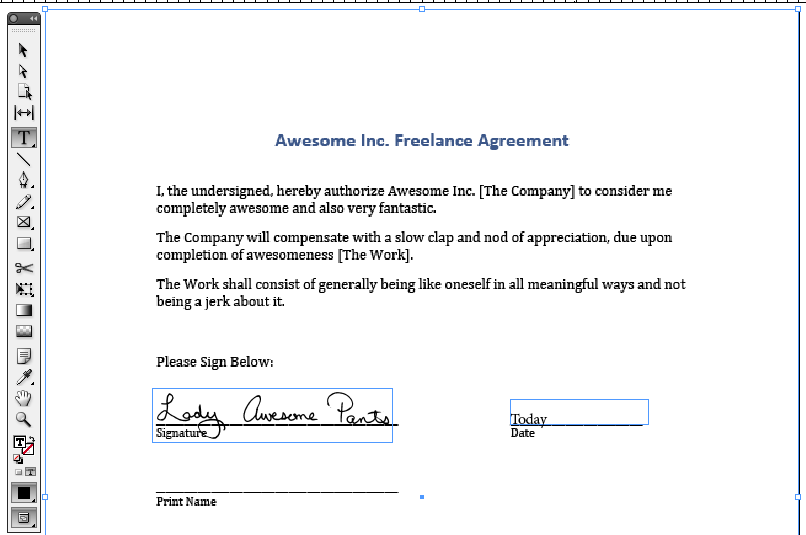
The date is aligned to the bottom of the text box
You can nudge the text frame so that it is as far above of the line as you find visually acceptable.
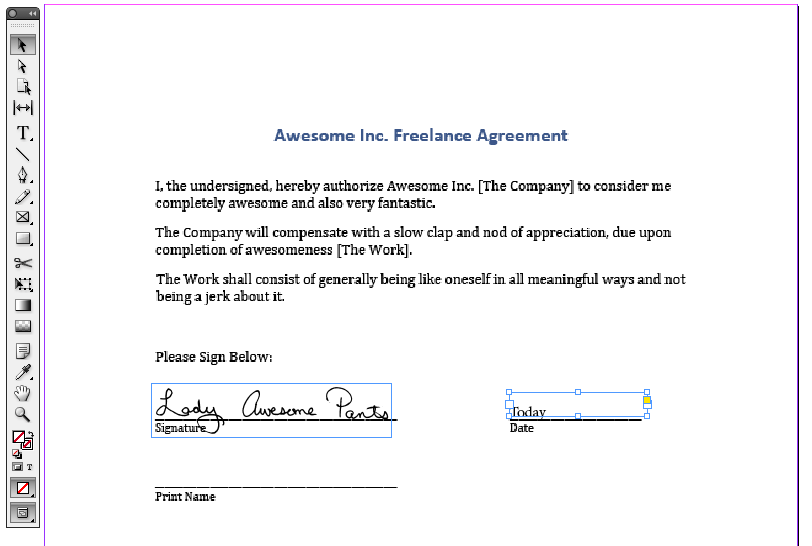
Nudge text frame into place
To quickly create a second text frame with the same attributes, hold down Option (Mac) or Alt (PC) button and click and drag on the text frame. This will create a copy of the text frame, leaving the original one where it was. Drag or nudge it into its final position.
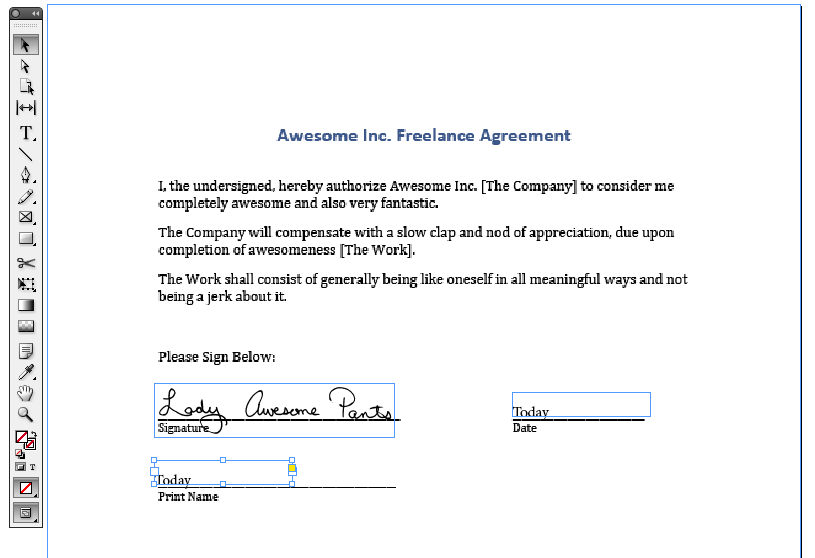
Create a second text box
Double click on the frame to edit the text or switch to your text tool, and then modify the text.
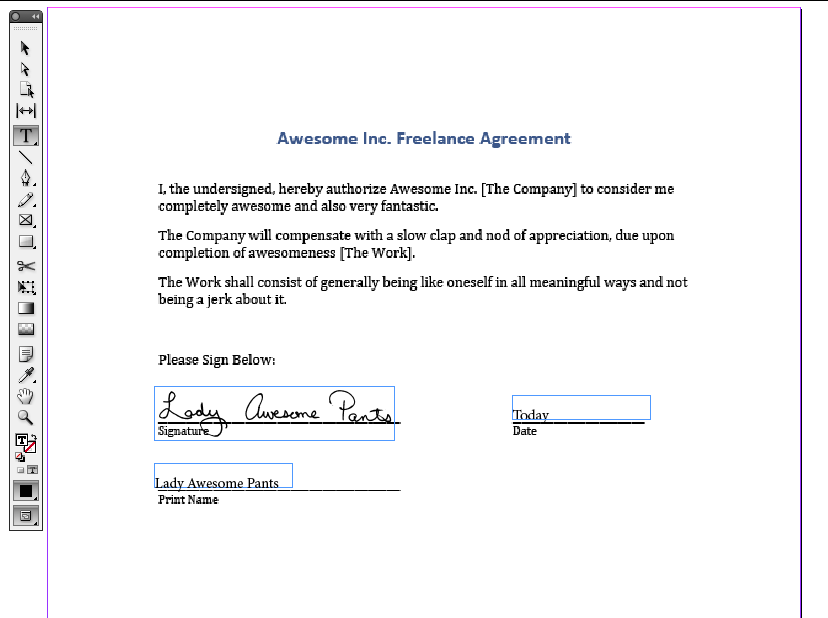
Update the new text box
Continue in this manner until you've filled out all the applicable information and signed in all the indicated spots.
The only step remaining is to create a PDF. Go to FILE | EXPORT. A dialog box will appear. Choose Adobe PDF (Print) from the Format drop-down list.
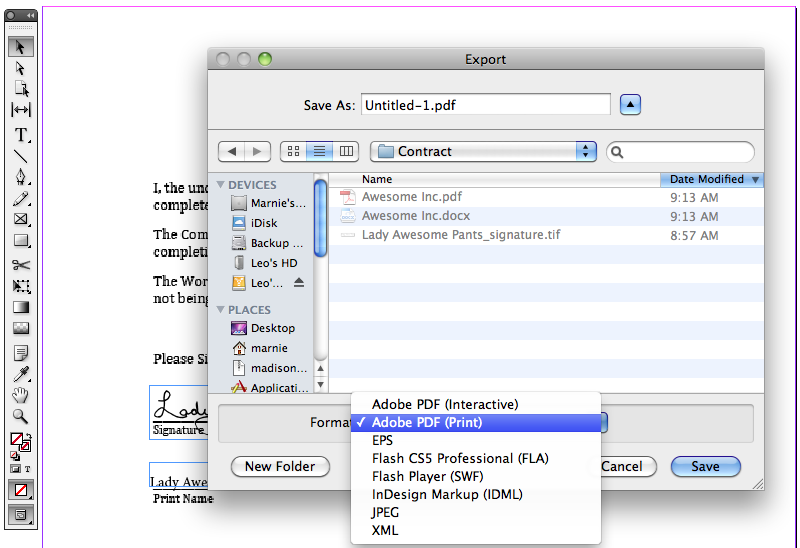
Choose PDF from the drop-down
Name your PDF and click Save to complete the process.
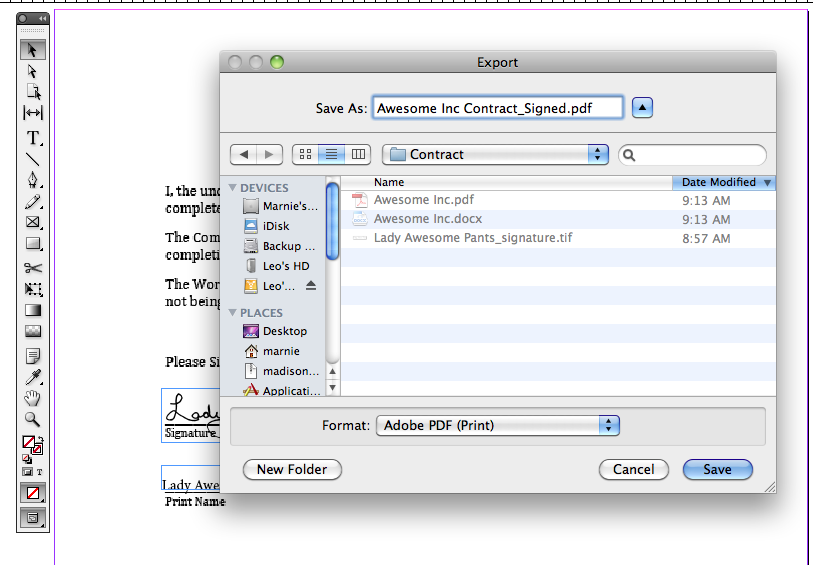
Save your PDF
That's it! Your contract is ready to email back and you have a signed digital copy for your records.
I may actually add a part 4 to this 3 part series. Microsoft Word does allow the placement of PDFs and you could do a hybrid of the two methods to sign a PDF in MS Word. This would work well for people who do not wish to invest in buying and/or learning a desktop publishing application.


Dear Lady Awesome Pants,
This is very cool! Indeed, it is Awesome.
Very truly yours,
Sharon