As a freelance designer, I sign a lot of contracts. It's just part of working with businesses on a project by project basis, and about 99% of the time, those contracts come to me as digital files.
I have a fax machine at home, and I could print out my contract, sign it, fax it to the person who needs it, who probably gets their faxes printed out on more paper and then I could wait to get a copy of the version they signed, and file that away, but honestly, that seems wasteful and unnecessarily labor intensive. I'm also partial to storing files digitally so the paper workflow is not ideal. I have enough unsorted clutter in my house.
As a side note, while I'm posting this as a knitwear design tutorial, it really is just a useful thing to know in general. This skill was invaluable when we were buying a house, and again when we refinanced. If you are applying for jobs, filling out contracts, or signing any file you receive digitally, you can use the methods I'll be covering.
In this post, we'll be covering the creation of a reusable image of your signature. Because I'm not completely out of my gourd, I am going to be using a signature of my nom de rien, Lady Awesome Pants, as opposed to my actual real signature, which someone might want to use for nefarious reasons.
In the following posts, we'll discussing using the image to sign your contract.
If you want to play along with the home game, you can download the signature, a sample Microsoft Word contract and a sample PDF contract by clicking the links. You can also download the unretouched scan of the signatures, here.
For this step, you'll need:
- pen
- paper
- scanner or digital camera
- Adobe Photoshop or photo editing software of choice*
*I'm using Adobe Photoshop CS5 on a Mac. If you are using a different photo editing software, you may need to refer to your user's manual.
Find yourself a good, medium point, dark (preferably black) ink pen and a clean piece of paper (no lines, no show-through from anything printed on the other side) and write your name and/or initials a bunch of times. Try to do this on a surface that's not too hard, a catalogue under your piece of paper works nicely. Press firmly as you sign. You don't want a light whispy signature, you want something clear and legible.
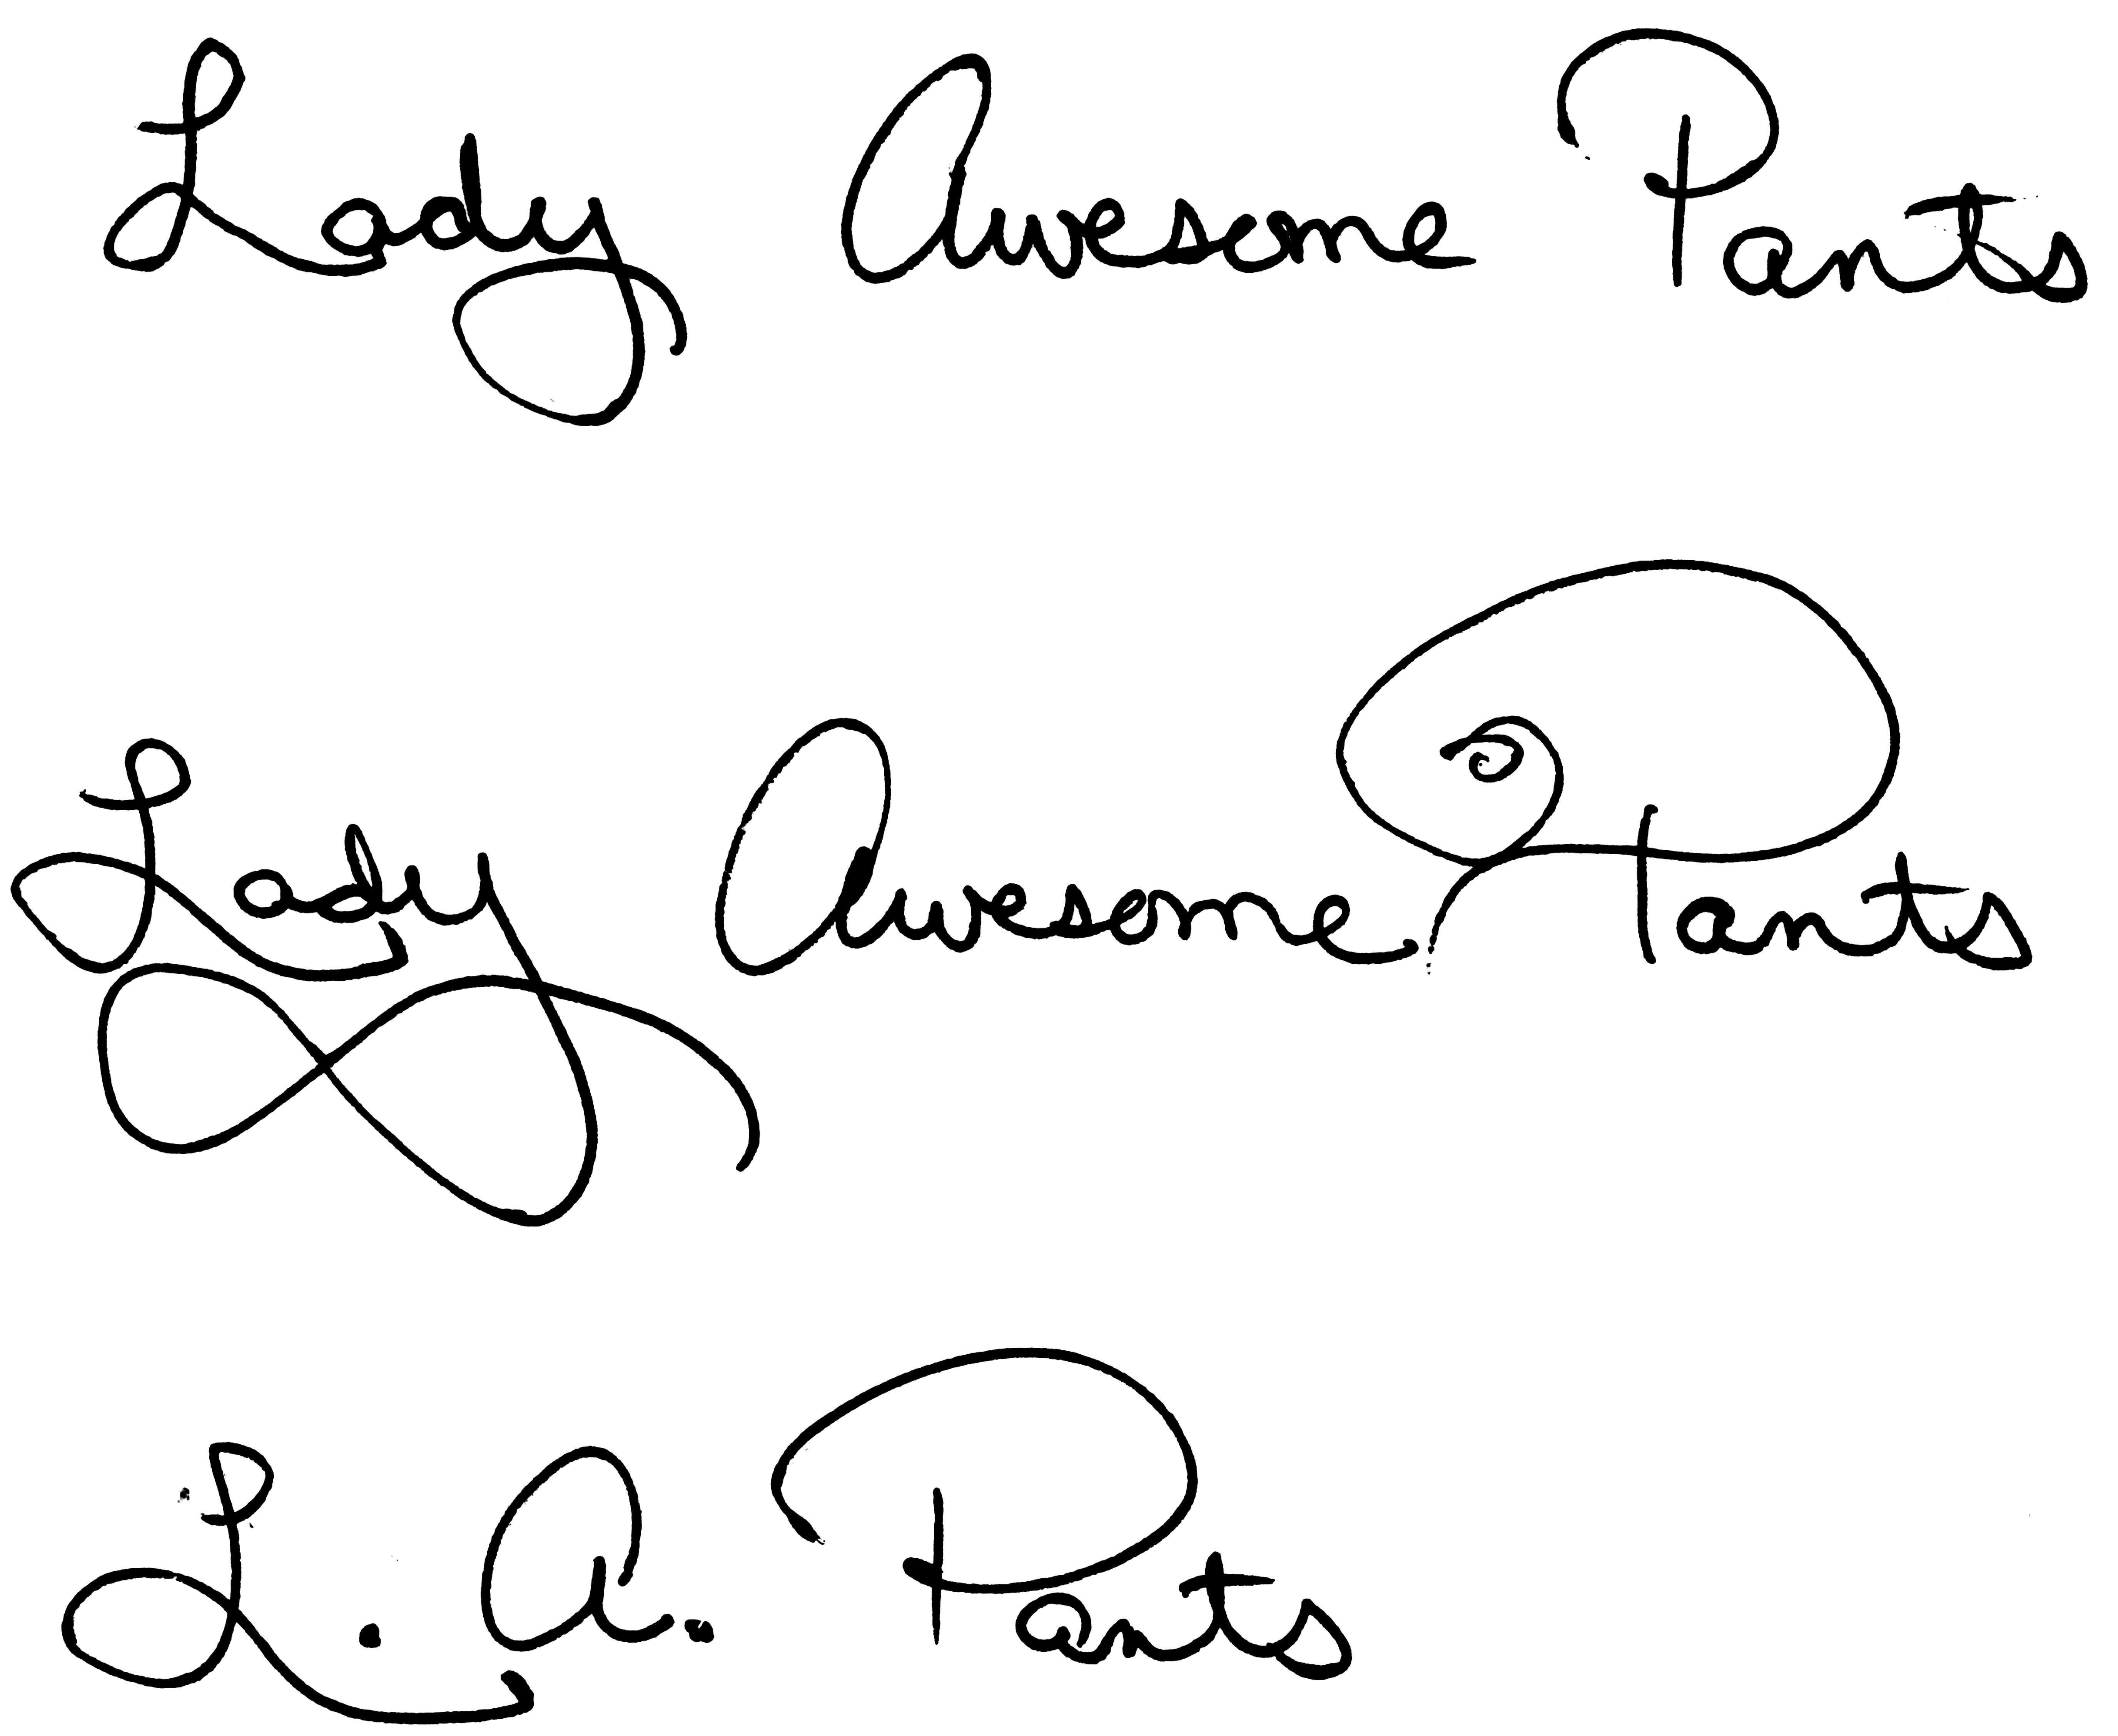
Signature Samples
Once you know you have at least a few examples that you like, get ready to scan your page. I usually scan the whole page. Sometimes, it's not until after you've cleaned up the scan, that you can tell which signature will work best. I like to scan at a high resolution, in grayscale, to ensure I get all the detail I need with no unnecessary noise.
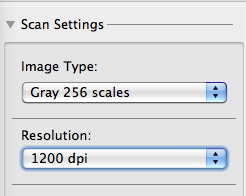
Scanning settings
If you don't have a scanner, you can photograph your signatures with a digital camera, just make sure you do so in good, natural light, on a background that won't show through your paper and that the signatures are in focus.
Depending on your scanner, your digital camera, the lighting, and whether or not you fed your Mogwai after midnight, your digital file may be too dark or too light or otherwise somewhere short of perfection.
Note: If you scanned or photographed your signature in color, convert your file to Grayscale by going to IMAGE | MODE | GRAYSCALE before proceeding.
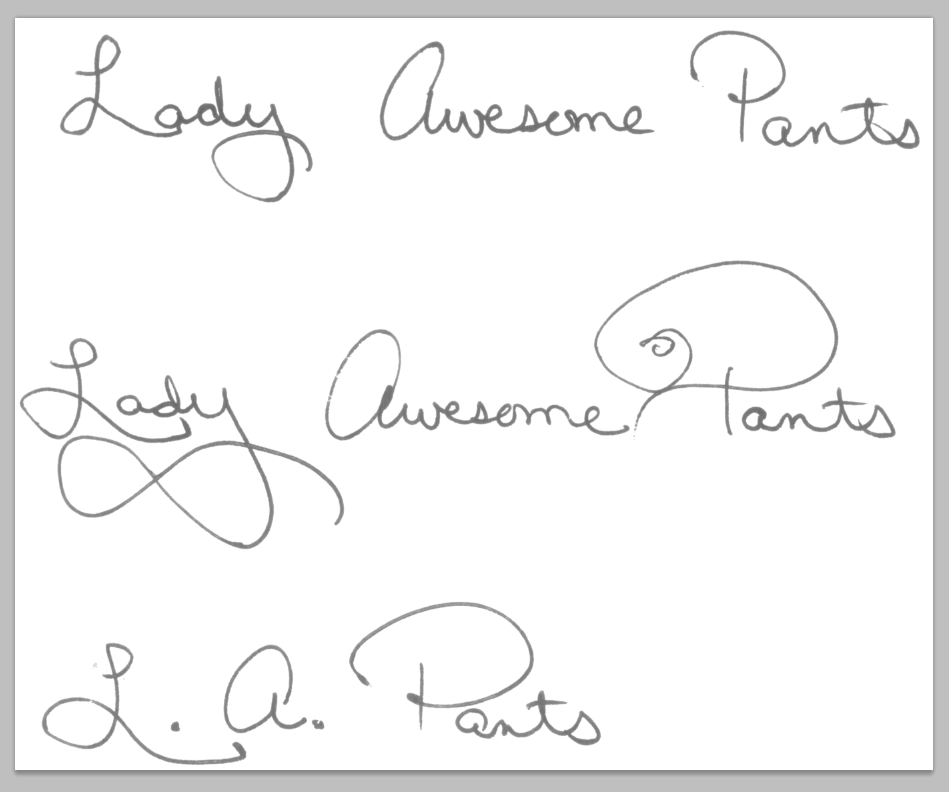
This raw scan is not living up to its full potential
In Photoshop, go to IMAGE | ADJUST | LEVELS
This will bring up a set of sliders that will allow you to clean up your scan. Bring the black triangle as close to the white triangle as possible. That will make everything on the page either pure white or pure black and remove all shades of gray. Play around with moving them more to the left and more to the right. One direction will make your lines appear thicker, the other will make them thinner.
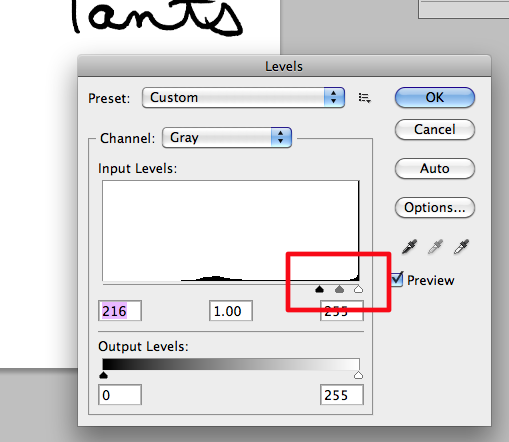
Adjust Levels
Next we'll convert the mode to Bitmap. Your image must already be grayscale for this option to be available. If it's not grayscale, convert it now. Bitmap files are made up of only black and white pixels, no shades of gray, no color. This is a good format for pixel based logos and line art. Additionally, many programs, like InDesign, Quark and other desktop publishing applications, will view the white pixels in bitmap images as transparent, which can be useful with signatures that are supposed to sit on a line. You'll see how this works in the InDesign portion of this tutorial, to come at a later date.
Go to IMAGE | MODE | BITMAP
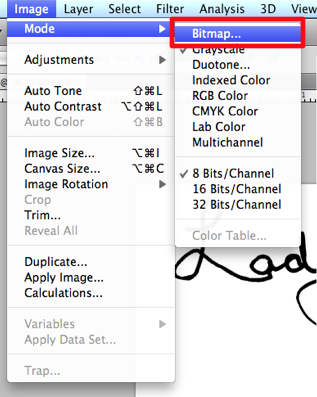
Change Mode to Bitmap
Choose 50% Threshold from the Method drop-down. I like a resolution of about 1200 dpi. I would avoid going below 1000 dpi.
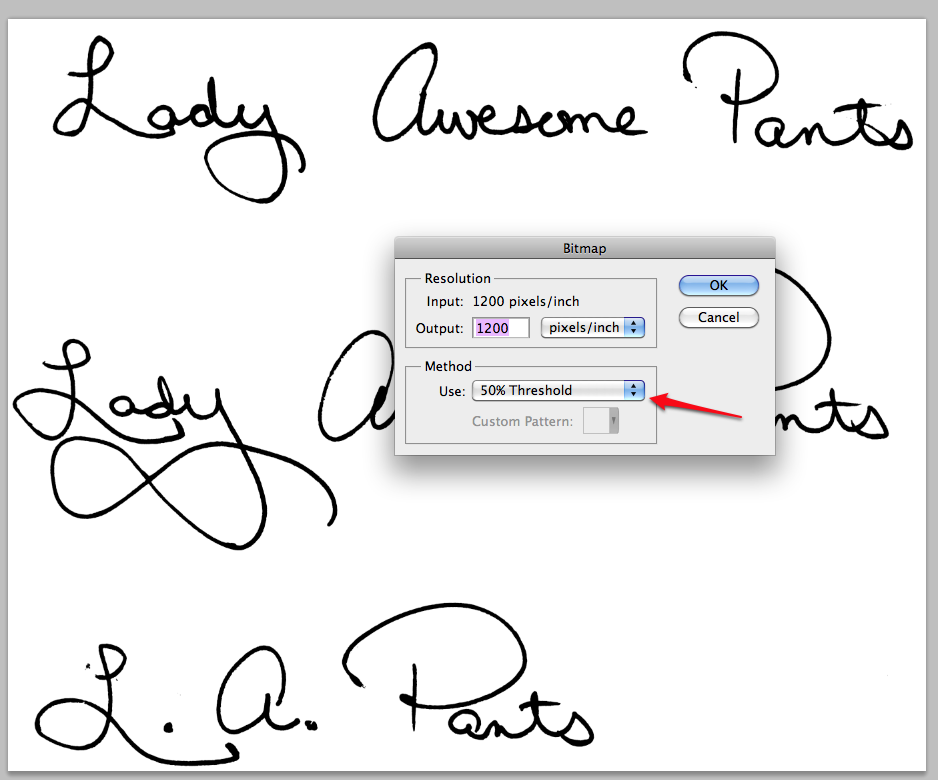
Settings for conversion to Bitmap
If you adjusted your Levels properly, you won't notice much change in your file. If your signature looks too washed out or too blobby (technical term) after conversation, that means you didn't adjust your Levels slider to be close enough together. Simply undo and adjust your Levels further.
If you are happy with the results, you can crop your image so that you only have your favorite signature visible.
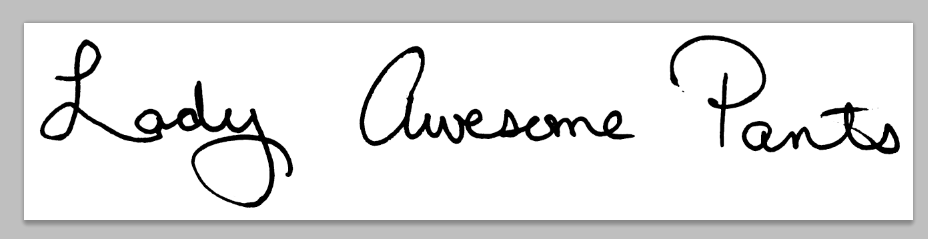
Cropped
Save your file as a TIFF.
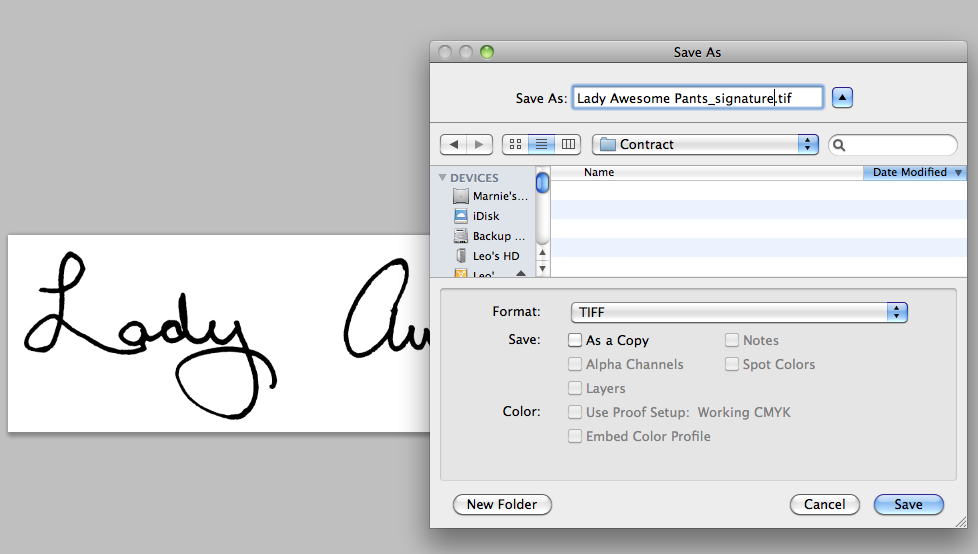
You might be thinking, "But Marnie, what is this TIFF madness of which you speak? Why can't I save it as a JPEG?"
JPEGs do not support the BITMAP format because JPEGs are always, RGB (color) images. So all that work converting to a bitmap, to make a good quality piece of line art, will be lost. It will still work well enough, but if your image software supports Bitmap and TIFF format, that's the way to go.
That's all there is to it. You now have a lovely file of your own signature, that you can use to sign digital files.
In the next tutorial, we'll talk about using the file to sign Microsoft Word documents and in the third and final installment, we'll use this file in InDesign and talk about adding typed text to PDF forms.

Thanks for putting this together. It is very useful and I've often wished I knew how, but then never remembered to figure it out when I had time.
Also, I really like your nom de plume. It makes me think of some terribly awesome crocheted pants I saw on - where else? - pinterest.
Is Lady Awesome Pants related, perhaps, to Captain Tightpants? Just wondering here...