Most pictures may be clicked to enlarge.
This is the last in a 3-part tutorial covering this spreadsheet, and one of several tutorials on using Excel for designing. There are two previous tutorials in this particular series that combined, give you all the info you need to understand the various fields in the spreadsheet. And that spreadsheet? It's got the raw numbers needed to make this little shell.

NOTE: The attached spreadsheet is just a sample and contains measurements that may be useful but which may not meet the standards for some publications. You are welcome to use what I have for your own design purposes but it'll be you who has to ultimately support any patterns written from it, so do your research first.
Special notes:
I've used Ysolda's measurement chart as a reference for many of the basic sloper measurements.
I'm using Amy O'Neill Houck's tutorial on estimating yardage to create my yardage estimation formulas.
The goal
In the two previous tutorials, we learned about
- Rounding
- Round to a whole number
- Round to the nearest Even or Odd number or Round, Round Up or Round Down
- Round to a multiple
- Round to a multiple plus
- Intro to IF statements
- Evenly spacing shaping
- Every X rows Y times
- Next and every X rows Y times
In this tutorial, we'll cover
Calculating finished garment measurements
Despite the fact that you has specific target measurements in the first section of the spreadsheet, the nature of gauge and that whole issue with not being able to knit half or quarter stitches, your finished measurements may deviate slightly from your intended measurements. Additionally, it's always possible that you made a mistake with one of your calculations and your actual armscye is actually only 2" deep, which may not be the result you were hoping for. Having a totals box that actually divides the numbers of stitches or rows used by the gauge, gives you accurate measurements for your schematic and a good sanity check for your pattern.

Let's take a look at how I determined the finished hem circumference. Look at cell C104
=MROUND((M43/st),0.25)
This piece is knit in the round, so I took my original cast on (M43) divide it by the stitch gauge and round the whole thing to the closest quarter inch.
| Formula element | Reason |
| = | Indicates a formula |
MROUND(value, multiple) |
Rounds the value to the closest multiple. This was covered in a previous tutorial. 0.25 as the multiple will round the number to the closest quarter inch. |
| (M43/st) | The stitches that make up this value, divided by the stitch gauge. |
This also works for length. Let's look at cell C110 which gives us the Armscye length
=MROUND(((M86+M86+M87)/row),0.25)
Here, we are combining several values to get the full armscye length, though if you have a running total field, you can use that instead. The construction of this formula is identical to the one above, just remember to divide by your row gauge instead of your stitch gauge.
Make sure you check that your finished measurments are close to your target measurements. If something is off, you have either calculated the measurments wrong or make a mistake in your pattern.
One of the great things about having a spreadsheet is that you can quickly convert all your values to metric (or imperial, as the case may be) to make your pattern more easily understood by a greater audience. I like to include both sets of measurements in my schematic.

To convert inches to centimeters, we'll multiply the values by 2.54 and round to the nearest full number. You might opt to do quarter or half centimeter values, if you prefer. For that, you round to 0.25, or 0.5, respectively.
Let's take a look at cell M104 which converts the hem circumference. from inches to centimeters.
=MROUND((C104*2.54),1)
The portion is bold is the conversion from inches to centimeters. If you do all your calculations in metric, you can convert to inches by dividing by 2.54 instead of multiplying.
Calculating yardage based on a sample

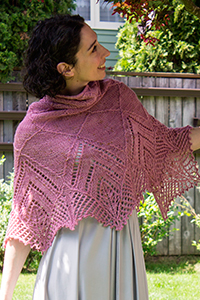
This portion of the lesson is based on the tutorial that Amy O'Neill Houck wrote on estimating yardage for different sizes. This might not work in all situations. For instance, if you look at my pattern, Astoria, the garment is broken up at the bust, by a colorwork band. The piece is one color above the band and another below. The ratio of gray to purple is different depending on the size knit, so larger sizes have more garment above the band (gray) than the smaller sizes. In cases like that, this formula should work for overall yardage but not necessarily for the individual colors.
Anyway, that's all to say that this is a good tool but may not work 100% of the times.
In short, Amy's suggestion is to use the bust measurement combined with the sample size yardage to make an algebraic formula to determine the yardage for different sizes.
In this case, my sample size was Small. The finished measurement for the small is 40". My yarn ball listed meters and grams, so I determined how many meters per gram, weighed my garment in grams and determined how many meters I used. I got 750 meters and added 10% to get 826 meters for size S. I've highlighted this value with a pink border. Whatever I put in this box, will cause everything else to flow from there. If you knit a different sample size, you'll need to adjust the fields to account for this.
My finished ratio is 40"/750m
Now, I can extrapolate out the other sizes per the tutorial here.
Let's look at cell D122
=MROUND(((E122*D121)/E121),1)
| Formula element | Reason |
| = | Indicates a formula |
MROUND(value, multiple) |
Rounds the value to the closest multiple. This was covered in a previous tutorial. 0.25 as the multiple will round the number to the closest quarter inch. |
| (E122*D121) | Multiply the sample meters by the target chest circumference |
| /E121 | Divide the value above by the sample chest circumference. |
Since I wish to include both meters and yards, I can convert meters to yards by multiplying the meters by 1.0936133. Divide by the same value to go from yards to meters. See cell C123 for an example of the conversion.
=MROUND((C122*1.0936133),1)

Lastly, if required, you can convert your yards or meters to skeins. Read your yarn label and determine how many yards or meters per skein, and then divide that number into the finished yardage/meterage. I like to round UP to the next full skein instead of including partial skeins. Remember not to use MROUND since you don't want to have the number of skeins round down and leave someone with insufficient yarn to finish the garment.
There were 105 meters per skein, for my sample, so I divided my meterage by 105, as shown in cell M122
=ROUNDUP((C122/105),0)
We covered ROUNDUP in this tutorial, if you need more information. Roundup rounds up to a particular decimal place, so a 0 at the end indicates rounding to a full number.
Putting your numbers into your pattern.
When it comes time to write your pattern, you can copy and paste these values directly into MS Word. This is much easier than hand typing all the numbers, especially if you are doing many sizes.

Copy the relevant line in Excel.
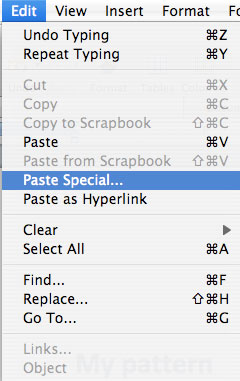

Go to the EDIT menu and choose PASTE SPECIAL in MS Word. Then choose Unformatted Text, from the dialog box. If you don't choose this option, Word will insert a table into the document instead of regular text.
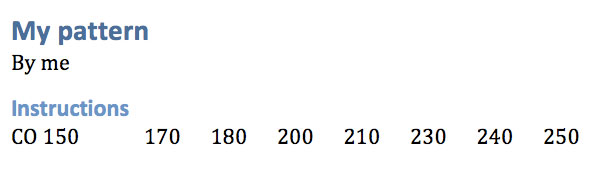
The text will be pasted with each value separated by a tab.
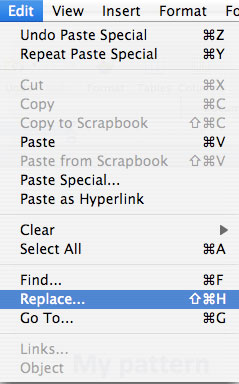
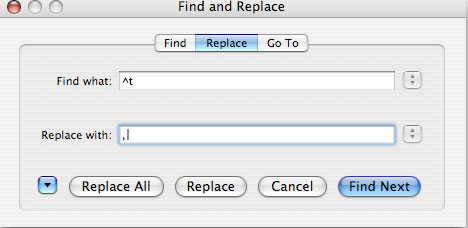
Use Word's Find and Replace option (found in the EDIT menu) to replace the tabs (^t) with a comma and a space.
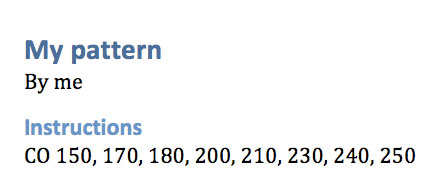
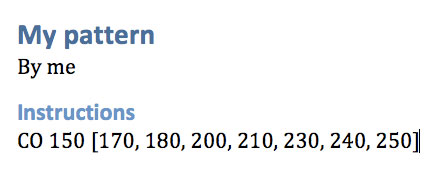
Once you've replaced all the tabs, you can keep the text as is or further format it per your pattern style.
Conclusion
I hope, with these tutorials, a few aspiring designers might feel confident enough to take the next step in the process. I don't think you should have to be a math genius to design patterns, heaven knows I'm not. And for the seasoned designer, I hope that you might pick up a tip or two from these tutorials, that you can use in your own systems. If any of you have any tips to share, I hope you will, either in the comments or as a stand alone tutorial on your own site.

Marnie you are so amazing! To take the time and effort to do this is wonderful of you. I really need to study your tutorials and use what I learn towards the patterns I'm working on. I just want to thank you for all you do. You are a very special person. I admire you! MysticStormy
I second that! You are amazing and admired by me too! Thanks for being so generous (and clever) and sharing this incredibly useful info!
Third the previous comments - your spreadsheets are actually helping me right now with a design - thank you so much.