Or how to keep your spindle in good spirits
I love to spindle and love it even more for its portability, but with an unsupported top whorl spindle, even a little abuse to the hook can turn your spindle from a delightful tool into an instrument of frustration.
Before heading out to visit some friends, this weekend, it hit me that I could make a great protective case for my spindle and store enough fiber for hours worth of entertainment.
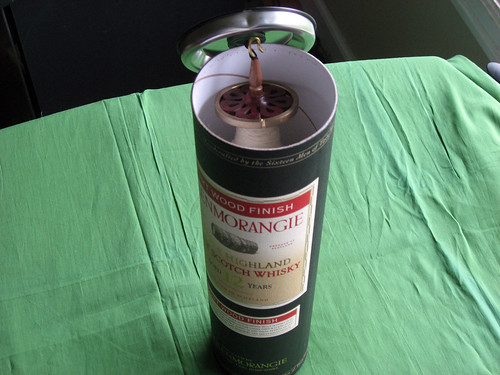
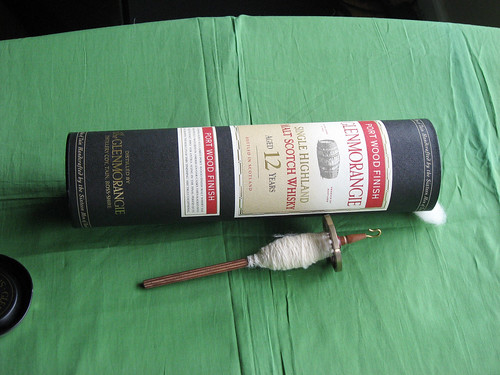
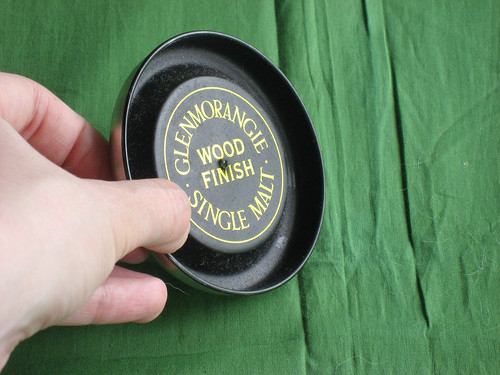
For as long as I've know Leo, he's been a big fan of scotch. Over the past 7 or so years, we've acquired a few of those sleeves in which some of the bottles are sold. These sleeves are made to protect the glass bottles during shipping, as well as make them easier to stack, and they come in a variety of sizes to suit the different shaped bottles, contained within.
If you happen to know of some non-alcoholic resources for these sleeves, please leave a comment. The basic structure is a firm cardboard tube with a metal base and removable metal lid.
These tubes are generally big enough to store a single spindle as well as some fiber for spinning. Frankly, if you didn't feel like doing anything else, there's no reason you couldn't use the tube, as is, with just the fiber for added cushioning, but you can step it up a notch by adding a loop from which to suspend the spindle.
It's easy and I'll show you how.
Obligatory common sense safety note: Please be careful when working with bangy, pokey, pointy, stabby, drilly, or otherwise ouchie producing implements. Children and inebriated adults should be supervised or distracted with something shiny. Wear eye protection or at least be willing to don full pirate regalia, if things don't work out according to plan.
Step 1: Get the right sized tube
Pick a sleeve that is larger than the spindle you wish to store. Most of my spindles are under and ounce and less than 3"/7.5cm in diameter, so this part was easy. If your spindles are significantly larger, you may need to take up drinking something you don't find quite so palatable, to get the perfect match.
Step 2: Gather your supplies

- Hammer
- Nail
- Scissors
- A piece of wood to place under work when hammering
- About 6"/15cm-8"/20cm of plain or elastic cord
- 2 buttons that each have 2 holes large enough to run the cord through at least twice
- Rotary tool or other sanding tool that is appropriate for metal (optional)
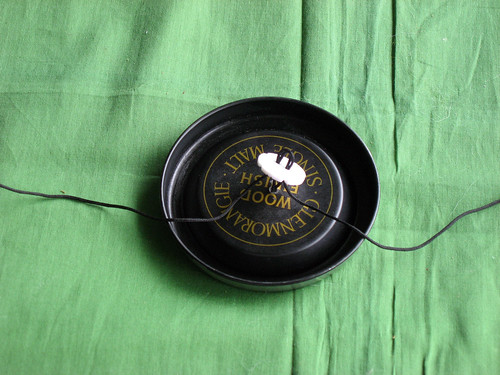
Step 3: Create hole in lid
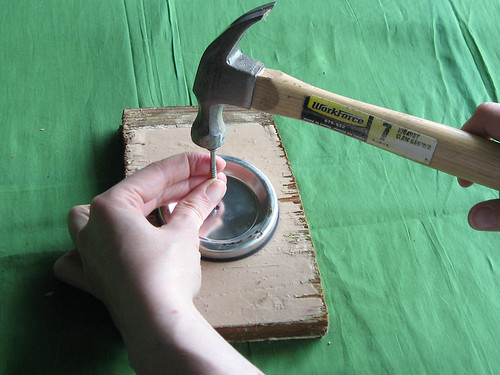
Obviously, if you have a drill, and wish to use that instead, go right ahead. I just wanted to make sure people without power tools could do this project too.
The hole needs to be big enough for the cord to pass through when doubled. Keep banging away (using a bigger nail if needed) until your hole is big enough.
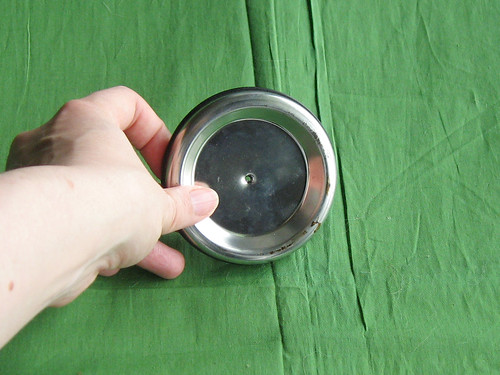
On the other side, you'll see some sharp and nasty splinters of metal. Please be careful not to poke yourself with them. If you have a rotary tool or a means of filing down these bits, now is a good time. You can also gently hammer the center of the cap, placing something underneath to support it. But there's no need to go too crazy with it. We're going to cover the issue in ensuing steps.
Step 4: Check your buttons
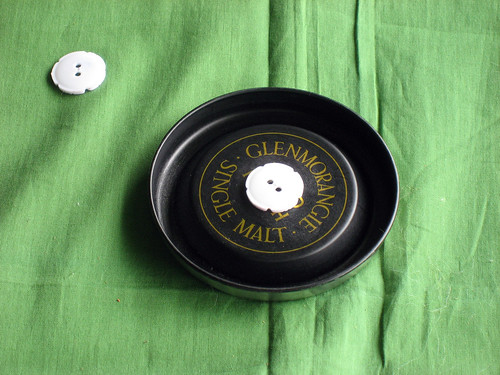
The buttons I chose have 2 holes in them and are slightly bowed out in the middle. The last bit will be useful if you were not able to file down the exit wound on the hole you made.
I got my nifty buttons from Ruinwen
Step 5: Tie a knot in the cord
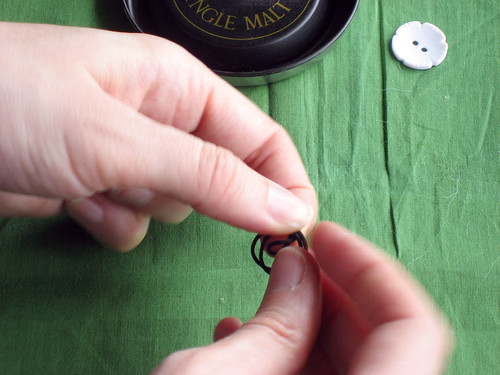

Fold the cord in half and tie a knot very close to the looped end. This will be the loop through which you hang your spindle.
You can skip this step if you are using elastic cord. Just make sure you don't pull the cord too tightly in the next steps. You want it to remain stretchy.
Step 6: String on first button
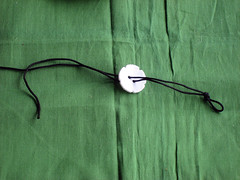
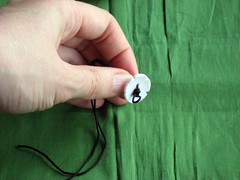
Insert each end of the cord into a separate hole in the button. The side of the button that is closest to the knot will be the public side of the button. If there's a side you prefer, make sure it is facing the knot.
Step 7: Run cord through hole in lid
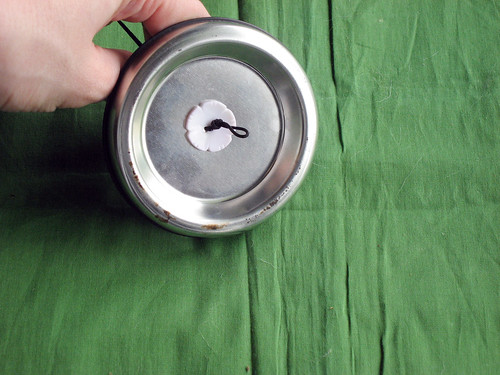
Run both ends of the cord through the single hold in the lid. Watch your fingers if you haven't sanded down the hole. You might find it helpful to push the ends through with the tip of a small DPN or pencil.
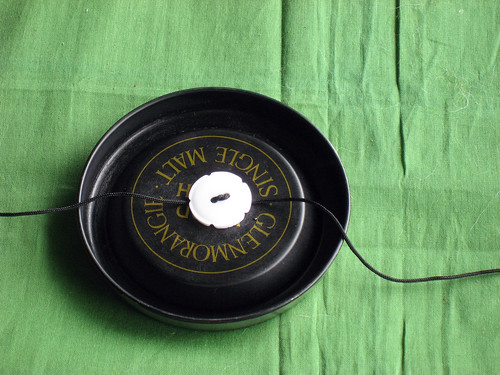
Step 8: String on the second button
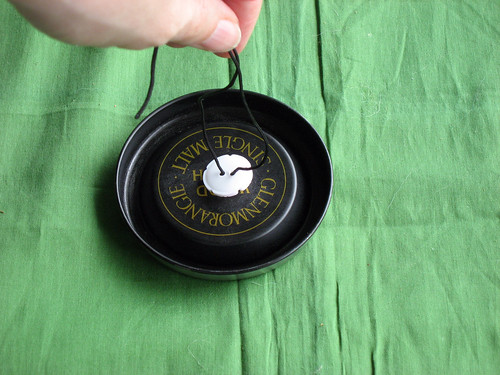
Put each end of the cord through a separate hole in the second button. If you have a button that is bowed out in the middle, make sure that the concave side faces the lid.
Step 9: Secure the cord
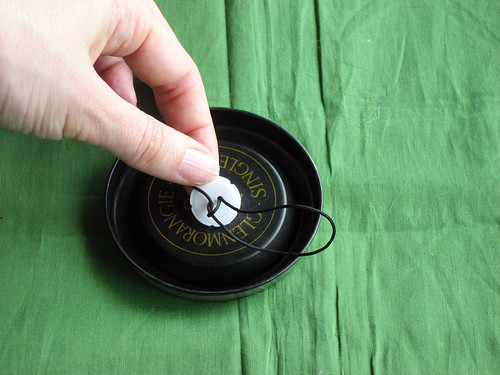
Tie an overhand knot and string each end through the opposite hole from which it came up.
Snug up the ends so the button lies flat.
Tie a square knot behind the button, with the two ends of the cord.
Wrap the ends to the other side of the button and tie another square knot. you may wish to repeat this process until you feel sure the ends are secured.
Step 10: Cut off the ends
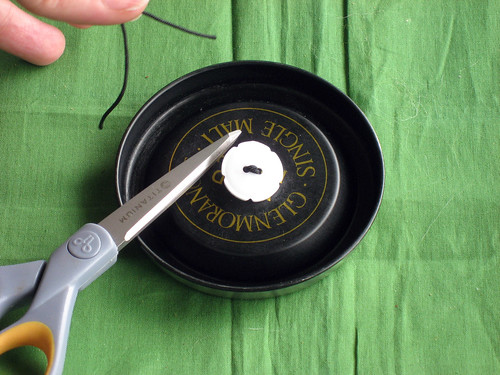
Cut the ends of the cord so they don't show, but not so they are flush against the square knot, since that might encourage it to come undone.
Step 11: Be done and be proud
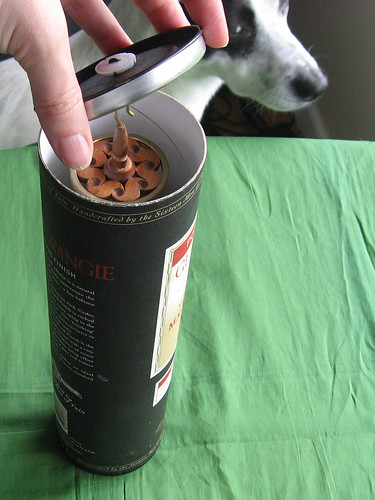
Your spindle carrier is ready to go. Just slip the spindle hook into the loop, stuff your fiber in the base and close everything up.
It helps to have a cutie pup overseeing the process.
Share this post
Comments (18)
Hi. Thanks for your idea.
I used it for my handmade box here
http://www.flickr.com/photos/7242996@N02/sets/72157607118111905/
Posted by rina | September 4, 2008 6:49 PM
Posted on September 4, 2008 18:49
Thanks, I linked to this post on my blog, this is great! I haven't found anyone else with an idea like this.
Vicki
Posted by vicki | June 22, 2008 9:14 AM
Posted on June 22, 2008 09:14
Cool! (And here I thought you were going to show us how to cover it with lovely fabric...) Even so, you are making me want to learn how to spin!
Posted by not a yarn snob | June 6, 2008 9:29 AM
Posted on June 6, 2008 09:29
What a great idea! I have a similar container from some fancy-schmancy lotion I bought several years ago. I've got to see if one of my spindles will fit inside. Thanks for sharing your idea!
Posted by Kathleen | June 5, 2008 10:42 PM
Posted on June 5, 2008 22:42
You are such a DIY-er! I love that! On a side note, you should see my collection of tomato boxes/yarn storage. Hey, they were free!
Posted by Kathy in KS | June 5, 2008 8:21 PM
Posted on June 5, 2008 20:21
I don't know exactly why, but this cracks me up. You are the Martha Stewart of spindle packaging!
Posted by Julia | June 5, 2008 6:19 PM
Posted on June 5, 2008 18:19
what a great tutorial! unfortunately, i don't spin, and i can't handle another hobby!
Posted by mai | June 5, 2008 11:57 AM
Posted on June 5, 2008 11:57
Wow, that's really clever! Good for you!
Now I'll have to try drinking scotch . . .
Posted by Rachel | June 5, 2008 9:27 AM
Posted on June 5, 2008 09:27
What a great idea! I have Dry Sack tins that will fit the bill. I loved the humor of your instructions! What a great way to use buttons! You are a genius! :)
Posted by Ruinwen | June 5, 2008 7:21 AM
Posted on June 5, 2008 07:21
Hi Thea! Good job on supervising!
Posted by Muriel | June 5, 2008 7:08 AM
Posted on June 5, 2008 07:08
Hey look at you - this is genius!
Posted by Nonnahs | June 4, 2008 9:52 PM
Posted on June 4, 2008 21:52
I've seen wine gift boxes like this that are very pretty. I've seen them at Cost Plus, Marshalls, and I think I've seen them at Costco before but you know, Costco inventory rotates. Marshalls I've probably seen them the most.
Posted by Laurie | June 4, 2008 9:10 PM
Posted on June 4, 2008 21:10
LOL! I love your wit, Marnie! ;-Þ
Posted by Renna | June 4, 2008 8:45 PM
Posted on June 4, 2008 20:45
Cool idea!
They sell containers like this to put bottles of wine(or other spirits)in for gifts. Check gift wrap and party supply stores.
Mary
Posted by Mary | June 4, 2008 8:20 PM
Posted on June 4, 2008 20:20
Ha, like Deb said, Pringles cans, if it's okay that the lid be plastic. Gross fact: they also make pretty good poop packout cans for leave no trace camping in conjunction with plastic doggy bags and dried coffee grounds and charcoal bits. ;)
Mmmmm....pringles...
Posted by Wendy | June 4, 2008 7:55 PM
Posted on June 4, 2008 19:55
Perhaps in a pinch mailing tubes might work. I've used them to make straight needle storage holders: large diameter for longer needles, and smaller diameter for dbl points. And because the tubes come long all you need to do is cut them down to the right length.
'Course I love the graphics on your spindle carrier.
Posted by Cat P. | June 4, 2008 7:51 PM
Posted on June 4, 2008 19:51
That's a great idea, and if I ever start drinking scotch, I'll have to remember it (grin). The closest thing we have in the house is the Quaker Oats container. Or, maybe we should buy some Pringles? (grin)
Oh, and all projects are more fun with a four-legged supervisor nearby. Or at least, that's what Chappy keeps telling me.
Posted by --Deb | June 4, 2008 7:17 PM
Posted on June 4, 2008 19:17
Brilliant!
Posted by Janice in GA | June 4, 2008 5:18 PM
Posted on June 4, 2008 17:18