
In the short time that I've been quilting I've learned enough to know that I have a lot to learn. I'm still really bad at it but I've been obsessively scouring the internet to bolster my skills.
While I've stuck with simple quilts so far, there's one slightly more advanced quilt that always catches my eye, the Cathedral Windows pattern. The first one I ever saw was here (youtube video). Amazing, right? But jeeze o pete, that's a lot of handwork.
Then I found this tutorial on the Moda Bakeshop site and a whole bunch of the handwork was taken out without losing a lot of what makes the pattern appealing to me. I tried the technique and ended up making this and while I liked it, there were a couple of things about the pattern I didn't love (and I really needed to work on my top stitching).
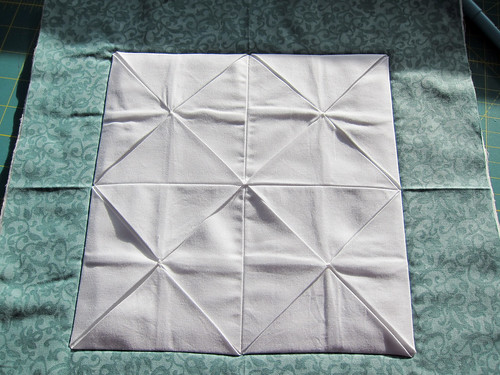
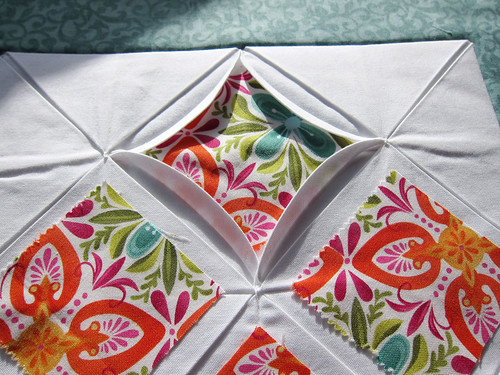
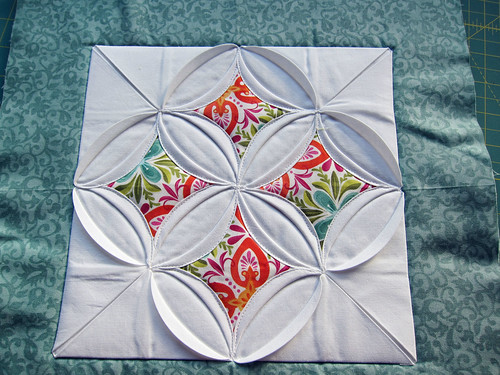
So based on the techniques I saw online and a few things I wanted to change slightly, I came up with this variation. The one I'm demoing, (shown above) doesn't cut off the edges of the windows around the edge and can be adapted to any size you like. It also has batting behind it, for a little more dimensionality. This could be easily adapted to a table runner, lap quilt or wall hanging. For bags and pillows, you could leave the backing off, if you wanted to.
Supplies
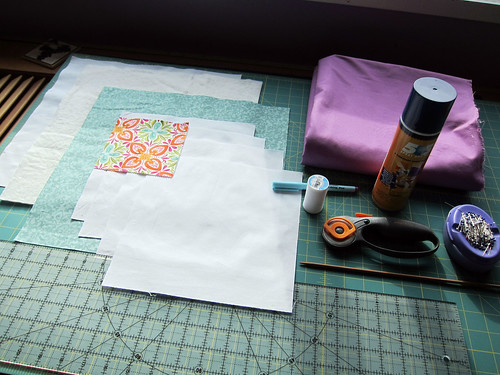
Fabric
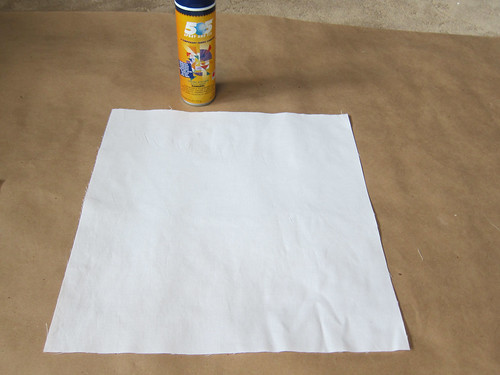
- 1 - 14" x 14" backing piece (shown in white)
- 1 - 14" x 14" piece of batting. If you plan to use this as a hot pad, use 100% cotton
- 1 - 14" x 14" piece of border fabric (shown in Moda Cotton Blossoms 55005)
- 4 - 9.5" x 9.5" for windows (shown in white)
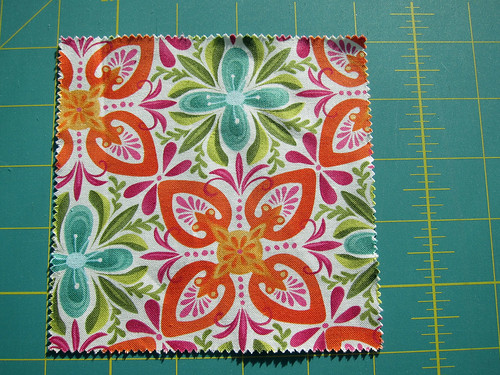
- 1 - 5" x 5" or 4 - 2.5" x 2.5" square(s) for window panes (shown in Moda Terrain by Kate Spain in 27092-13)
- Binding fabric (Shown in...heck if I know)
Other supplies
- Sewing machine
- Thread
- Rotary cutter/ruler/mat
- Marking tools
- Pins
- Hand sewing needle
- Point turner
- Iron and ironing surface
- Hand sewing needle
Optional
- Basting glue
- Water spray bottle
- Spray starch
- Scotch Guard
All images may be clicked to view them full size.
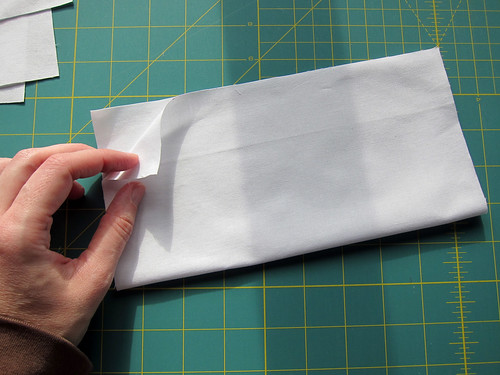
Create Windows - Make 4 Total
I found it helpful to use a little spray starch on the fabric before cutting out the squares.
 |
 |
 |
Fold 9.5" x 9.5" squares in half |
Sew up side seams. These can be chain pieced to save time |
Press to set the seams |
If you are wondering why these are 9.5" instead of 10", it's because a 10" square will produce windows too large to hold the 2.5" square panes. If you are using up scraps and don't care about using charms or jelly rolls for the panes, then feel free to use a 10" or any other size square that you'd like to use.
 |
 |
 |
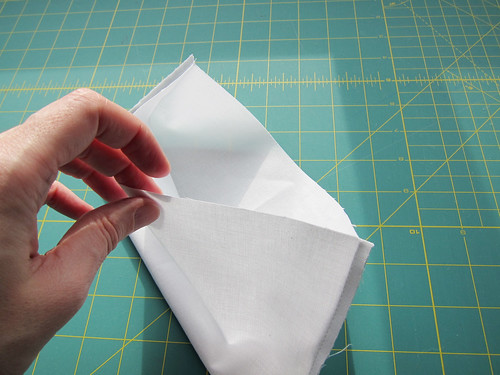
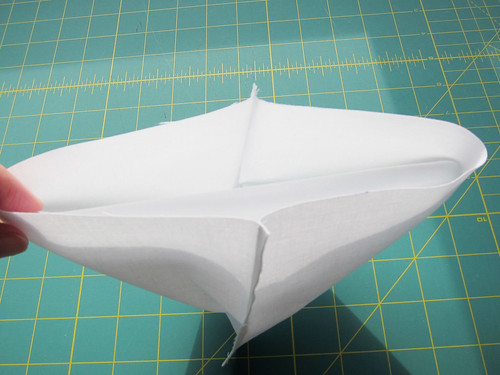
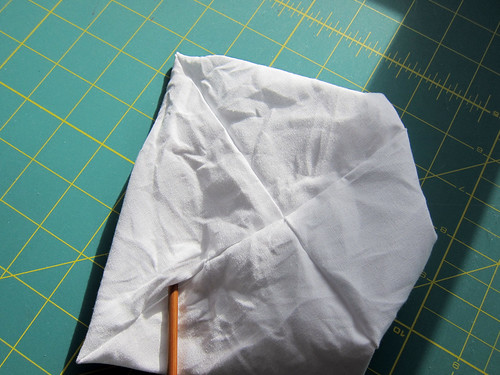
Open the pouch you've made |
Bring the seams together |
Press the seams flat so that they are situated as shown. This should help keep the seams aligned when sewing |
 |
 |
 |
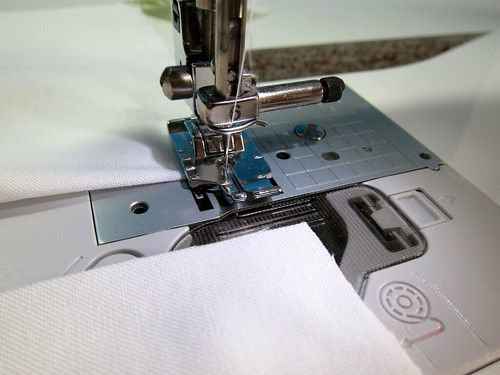
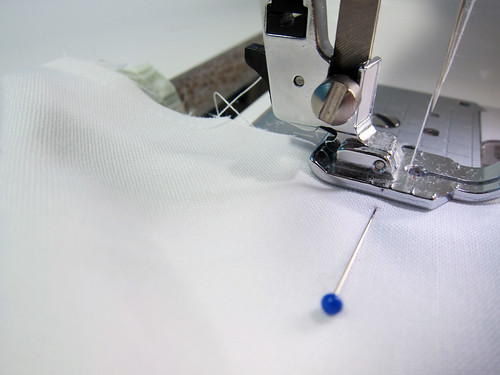
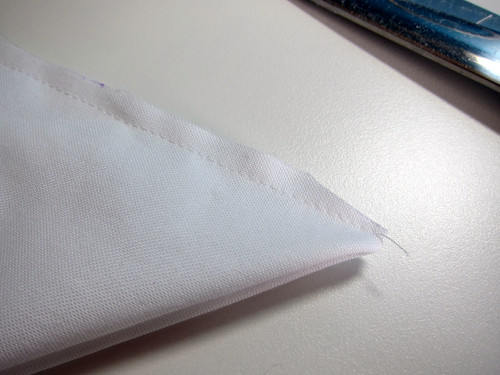
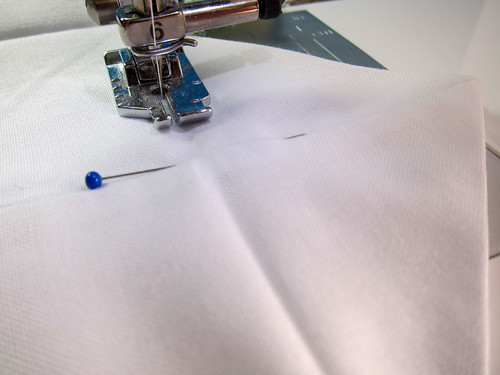
Pin if you like, don't if you don't. |
Sew the seam but leave a 1" - 1.25" opening about an 1.5" away from one end of the seam. Back tack both sides of the opening. |
I don't cut the thread while I'm sewing, I just back tack, and move the piece forward, back tack and sew to the end |
 |
 |
 |
Clip the threads crossing the opening. |
Trim the 4 corners at an angle as shown. There is no need to trim any of the other seams |
Turn square right side out and using a point turner, carefully push out all the corners. |
I don't see this mentioned in too many of the tutorials, but it makes a big difference for me if I trim the extra fabric at the 4 corners. Be careful not to trim too closely, lest you have a blowout while using the point turner. Ask me how I know.
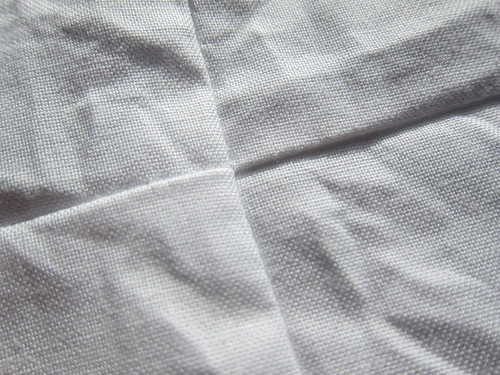
If you aligned your seams in the previous step, you'll get a nice clean intersection on the right side
 |
 |
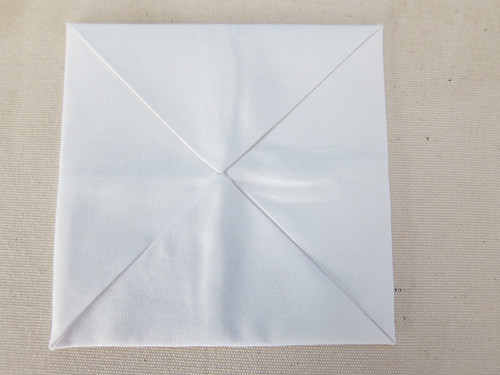 |
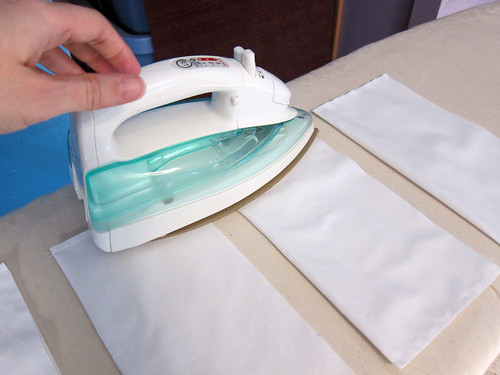
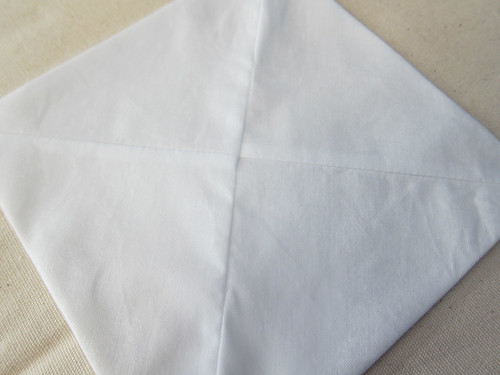
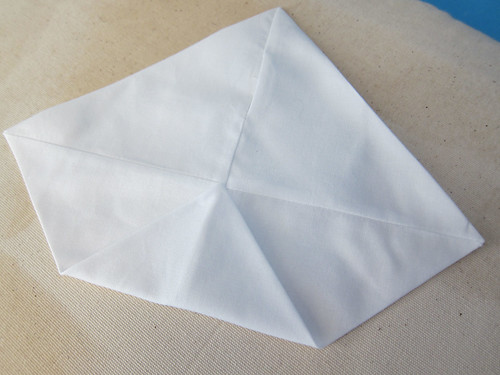
Press the square flat |
With the seam side up, fold each corner into the center point |
Try to get your new corners as straight as possible |
This step is pretty straightforward, flatten your square and press into place. I find it really helpful to spray the square with water so it's fairly damp and give it a good finger pressing first. Adjust corners and such until they look pretty good, before ironing everything into place. Give everything a good pressing and open the flaps to make sure nothing wonky is happening on the inside. The opening you used to turn the piece, can sometimes flop open in a bunchy way.
You won't need to close the opening unless you want to. You could certainly add a little Stitch Witchery if you like.
Sew windows together
 |
 |
 |
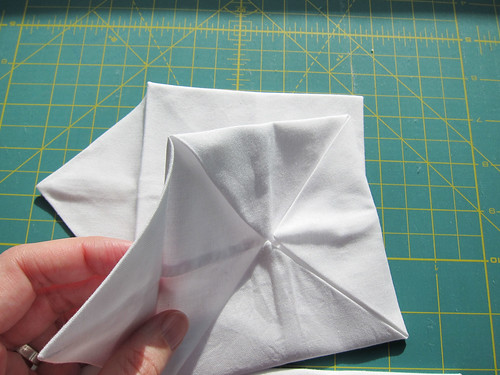
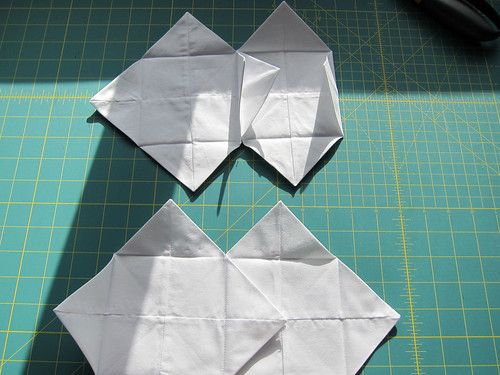
Place plain sides of two windows together |
Align seams. |
Sew together |
You have 4 windows, so you will do this step twice. It is probably easier to unfold the adjacent flaps before sewing. Be as precise with your seaming as you can.
When you are done, the pieces will look like this
 |
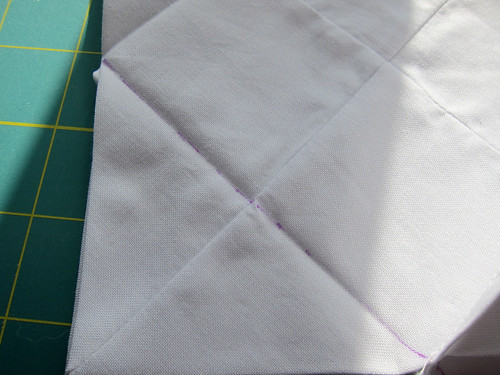 |
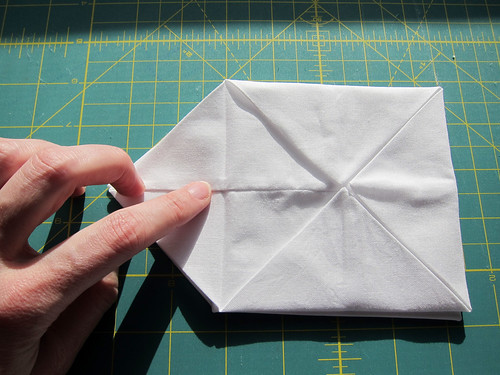
Place plain, non-flappy sides together |
If you have any trouble at all seeing your fold line, use disappearing marking pens to mark the line |
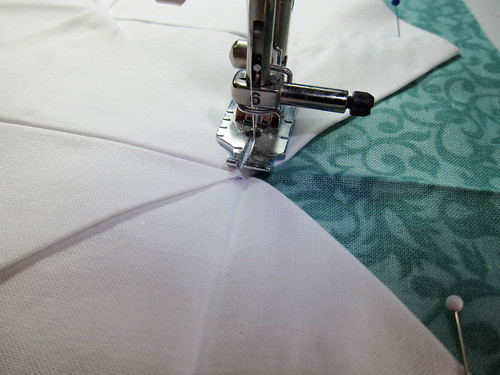
Stitch the two pieces together along one long edge (across two sets of peaks.) Be really careful you don't cut across the center points. I found my presser foot tended to get pushed around if I just sewed straight through, so when I got close to the center, I slowed down, and then adjusted the presser foot, when the needle was down, so that flap wouldn't hamper progress.
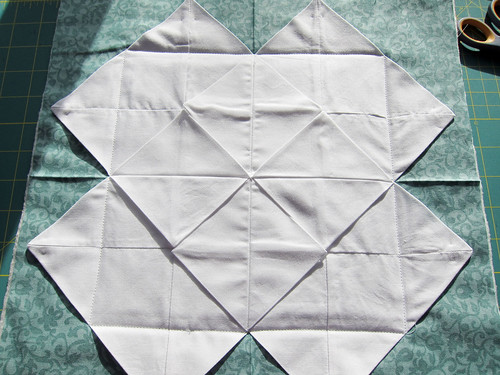
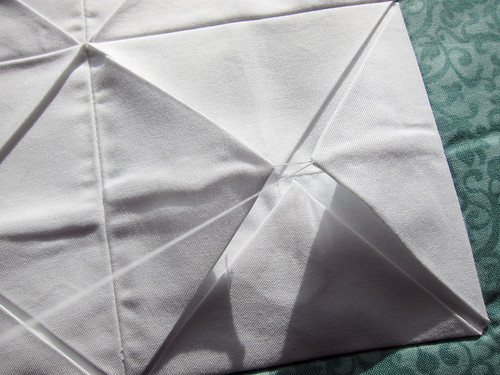
You should end up with something like this.
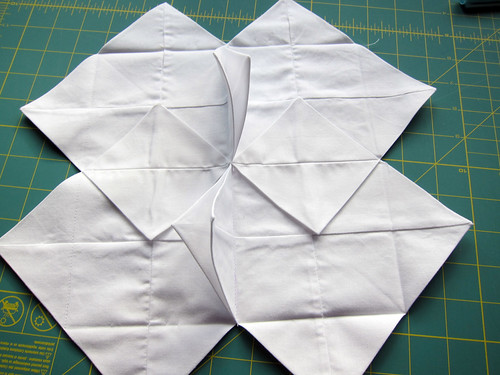
Press the diamonds flat (two are pressed flat here) and then repress all the outer flaps, back towards the center.
Assemble layers
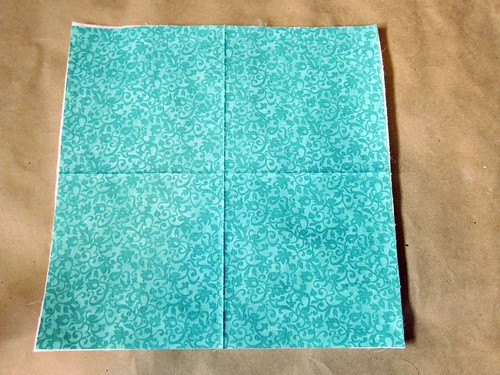
Take the border fabric and press it in half in both directions so you can easily find the center. Press all the way to the sides, as these will be guide marks in the next step
 |
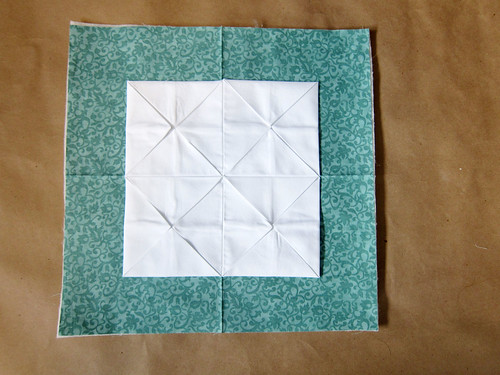 |
Using basting spray, baste the backing, batting and border into a sandwich, in that order. Wrong sides should be touching the batting. |
Spray the back (non-flappy side) of the windows and center on top of sandwich, using the fold lines as a guide. |
If you don't have or don't like basting spray, you may certainly use pins or thread basting to secure the layers.
 |
 |
 |
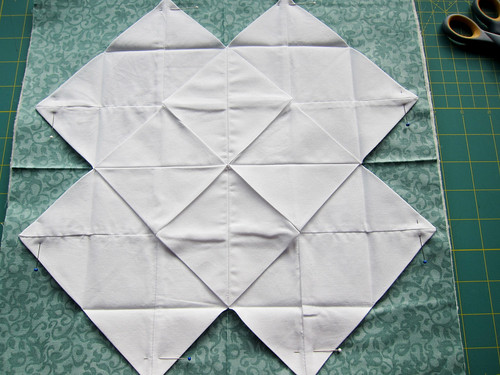
Open out the flaps and pin into place. |
Sew along the fold lines formed by the flaps. Be careful near the points. Sew just outside the points and directly along the fold lines |
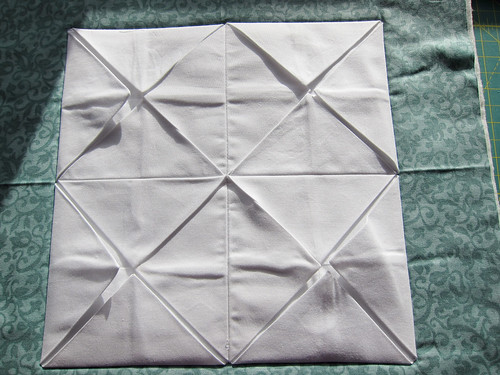
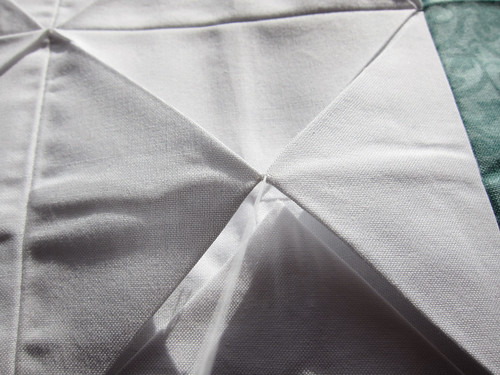
It should now look like this. |
Close the windows! Were you raised in a barn?
Fold the flaps back in and press. It should look like this.
So, I've seen this step done in a couple of ways. You could tack down the centers by machine, much like you'd sew a button on by machine. I have had dismal luck with this, but that's most likely a reflection of my limited skills. If you want to sew the centers down by machine, please feel free. Here's what works best for me.
 |
 |
 |
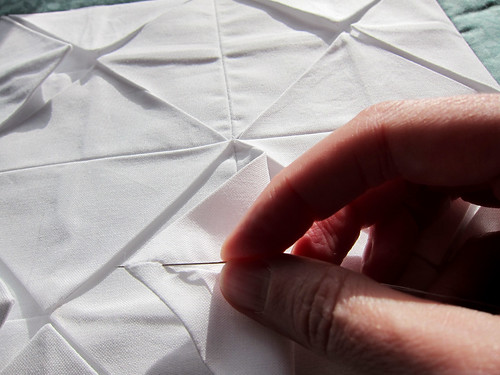
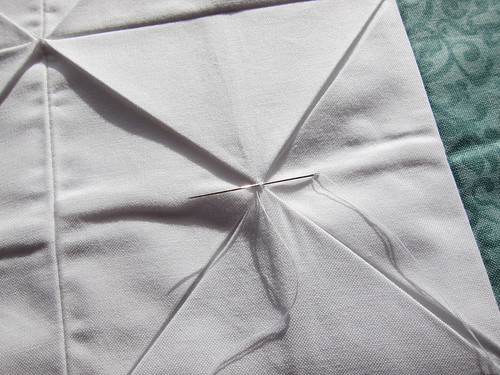
| Thread a hand sewing needle with matching thread. Tie a knot. Open a flap and insert needle about 1/4" away from point, into the seam and come out at the very point. | Pull thread taut and then sew through opposing point. | Sew through same two points a couple more times to secure. |
| |
||
 |
 |
 |
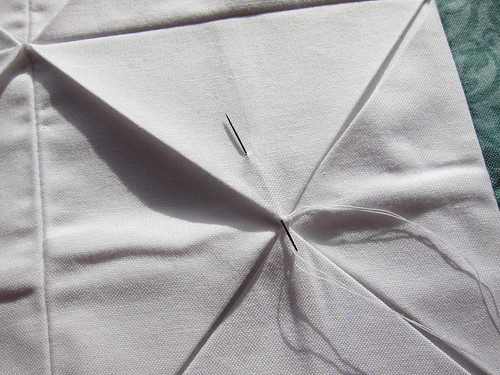
| Sew through the other two points a few times, being sure to bring thread around the bottom of the tack going across the first two points. | Secure thread with a few knots, insert needle into one point, come up a half inch away and cut the thread. | Repeat with the other 3 windows. |
Add the window panes
 |
 |
 |
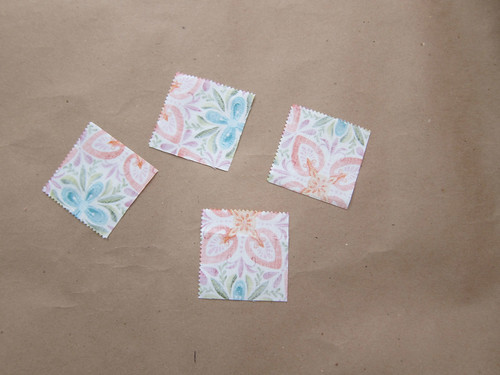
Cut your 4 - 2.5" squares if you haven't already. Shown is a single square from a charm pack. |
Spray the backs of the squares with basting spray if desired. |
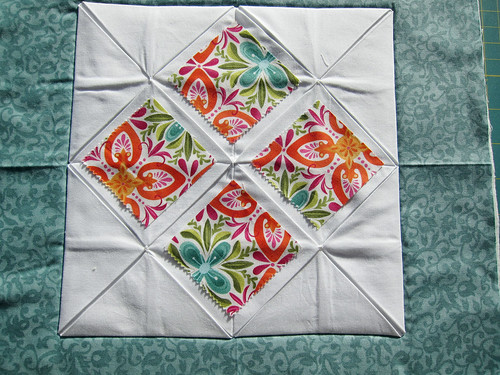
Align panes in the windows as shown. |
A single charm square or a 10" length of of jelly roll or a 2.5" strip of a layer cake can be cut to create the 4 window panes. You can also go scrap diving. If you started with a larger or smaller piece of fabric for the window, you'll need to adjust the size of your pane. There should be approximately 1/4" around the square. Too much or too little space around the pane and the raw edges will not be encased properly.
The basting spray is totally optional but I find it's easier to get my seams straight when I'm not worrying that the pane is staying centered.
 |
 |
 |
Using a finger, fold one edge around a pane. Bring it as far over as you can, so that the entire raw edge of the pane is covered. Press with loads of stream. |
Repeat on the other three sides of the pane. This is your chance to ensure that your pane is the right size to fit in the window. |
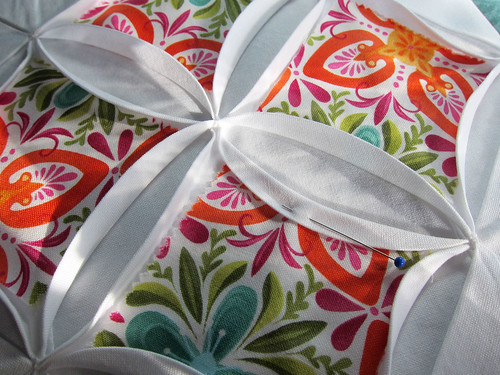
Repeat with the other three panes. Add a single pin to the location I've indicated here. Note the direction. |
Some of you may find you can skip this step or may find another method that works better (just pins, basting, winging it).
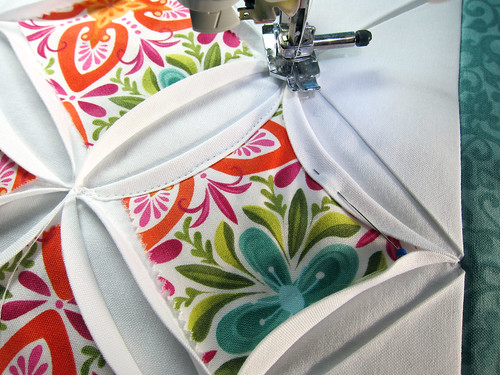
Sew the panes in place
|
 |
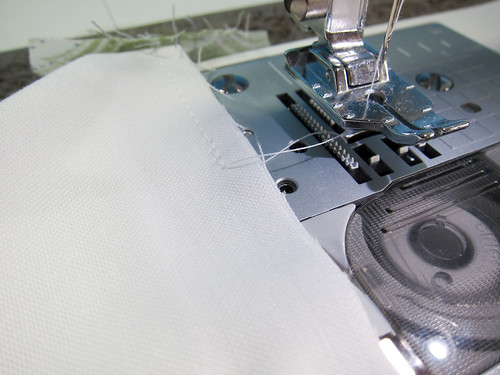
With the single pin in place, pointing towards the center, unfold any adjacent folds so they are out of the way. |
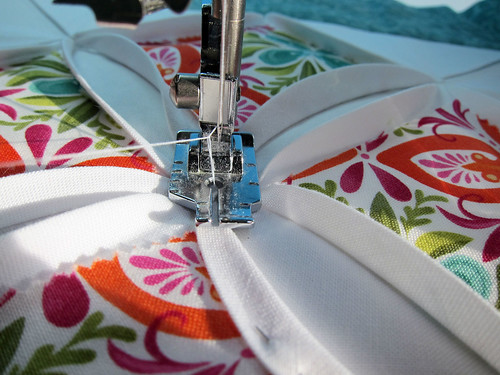
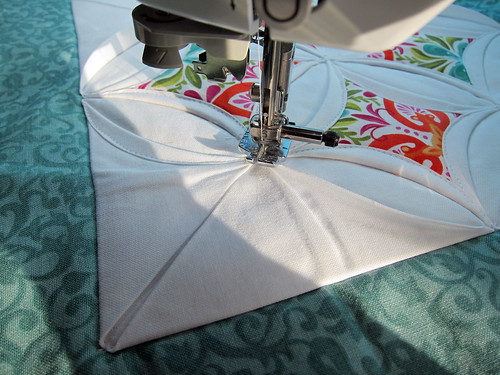
Start sewing from the very center of the piece. Pull up the bottom thread to the top and sew a few stitches in place to secure, then cut the threads. This will keep the threads from tangling on the back. |
Sew as close as you can to the free edge of the flap. Remove the pin as you go and use your fingers to keep the other end of the flap in place.
In a traditional Cathedral Windows quilt, this step would be done by hand which gives it amazing dimensionality. If you are that kind of motivated, knock yourself out. I think this is better for something that will be handled a lot, since there are no pockets to snag on things.
 |
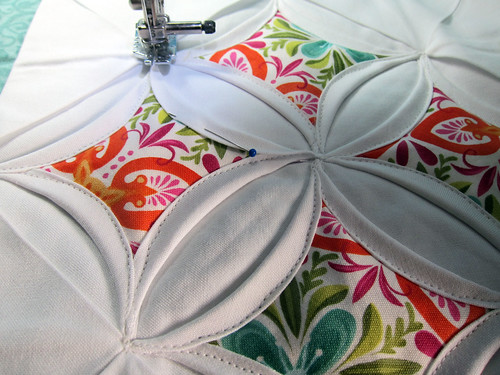 |
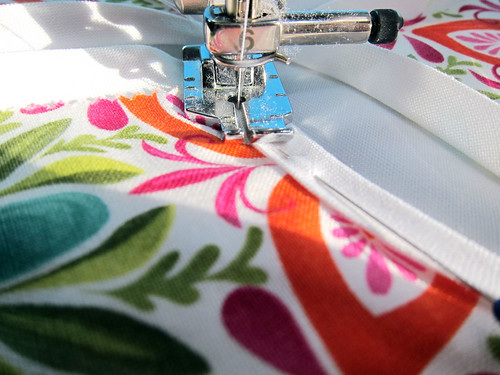
When you reach the end of a flap be sure to work to the very center of the intersection, pivot, pin the next flap in place and work around the next edge of the same pane. After finishing a pane, you'll be back in the middle, ready to start a new pane. |
Repeat around the remaining 3 panes, ending in the middle. Make a few stitches in place and then cut the thread. |
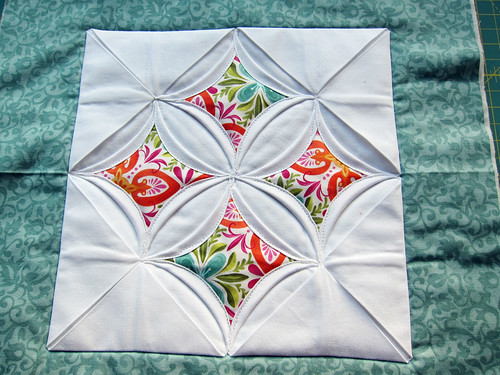
Your piece should now looking something like this, only without the crazy drunken money sewn seams (no offense to any drunken monkeys out there.)
 |
 |
 |
To complete the windows, repeat the process around the outer edges of each pane. |
After a first press, it should look like this. |
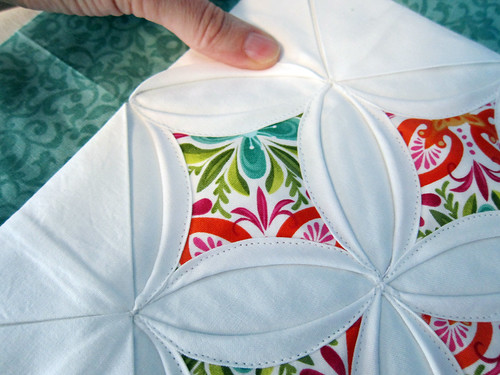
Begin sewing at any flap, and work your way around in one pass. |
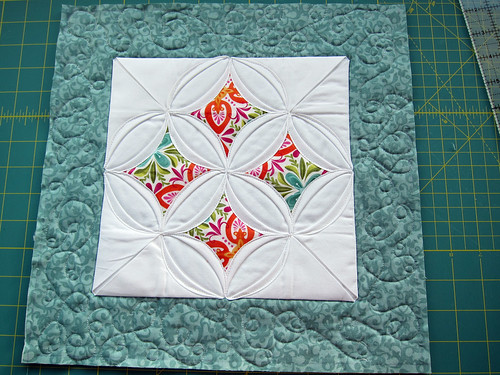
Your piece should now look something like this.
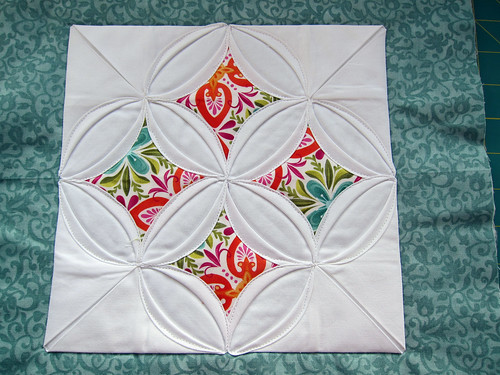
You may notice that I didn't fold back the corner flaps. You certainly could, if you liked.
Finishing the border
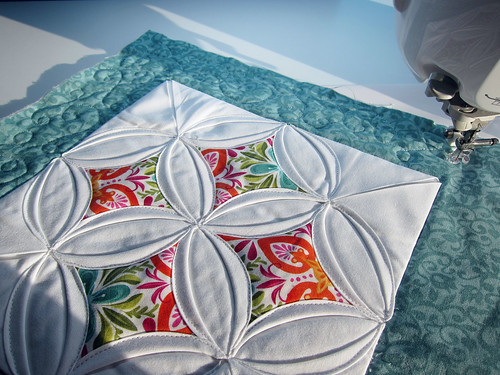
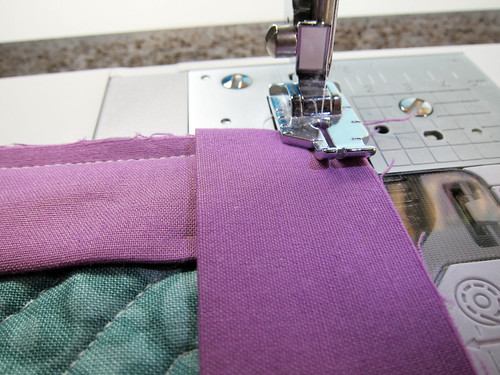
I am just trying my hand at freemotion quilting so you'll have to excuse how terrible mine is, but this is the point that you should quilt your border if you wish to do so. I suggest using an allover style pattern so that you can trim the border down in the next step.
 |
 |
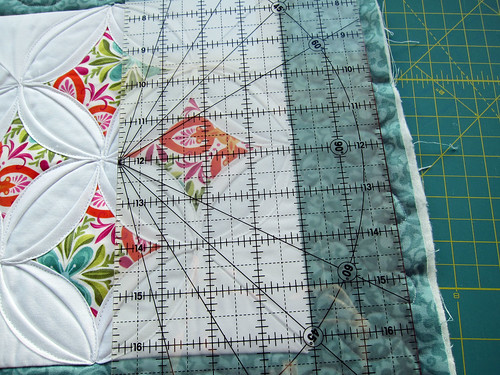
Using the windows as a reference, cut your border down to size with a rotary cutter. My border is 2" wide plus a 1/4" seam allowance for the binding, so a total of 2.25" |
It'll look a little spiffier after trimming. |
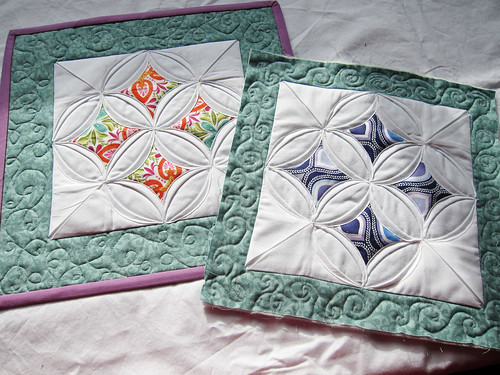
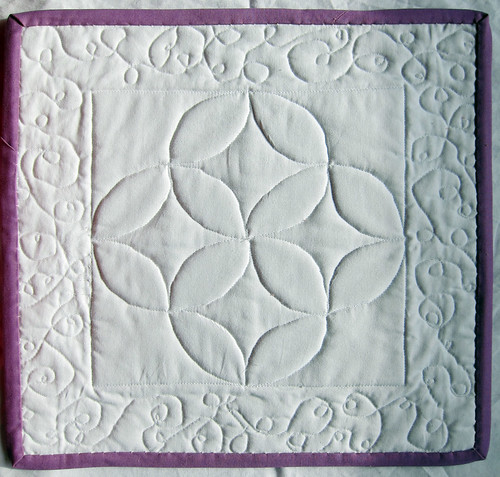
I actually think my prototype (no binding, below) had a better ratio of border to windows. I had a 1.5" border. Trim as you'd like or for whatever desired final size you like.
Binding
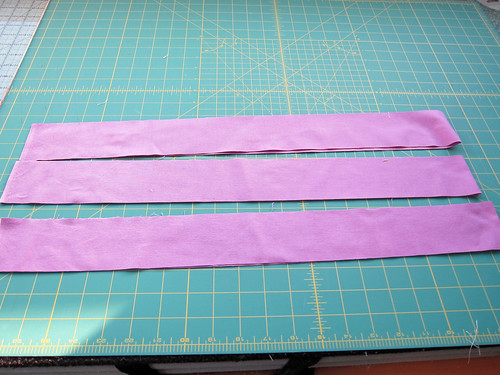
I cut three strips of 2.5" binding from across the full length of the fabric. I only needed a strip and a half.
 |
 |
 |
Cut binding |
Sew to right side of trivet matching raw edges and using a quarter inch seam allowance |
Sew to back of trivet |
There are approximately a billionty-seven different tutorials for adding binding to quilts, many of which don't require any hand sewing, so I won't go into much detail here. Do whatever makes you happy, it's quilting not air traffic control.
You're done!
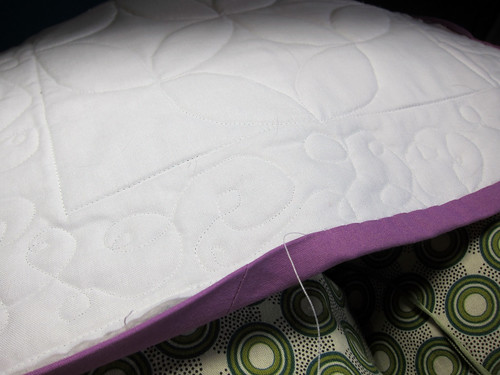
Depending on your sewing skills, you might even find that you like the back of the piece pretty well. Mine...well, not so much.
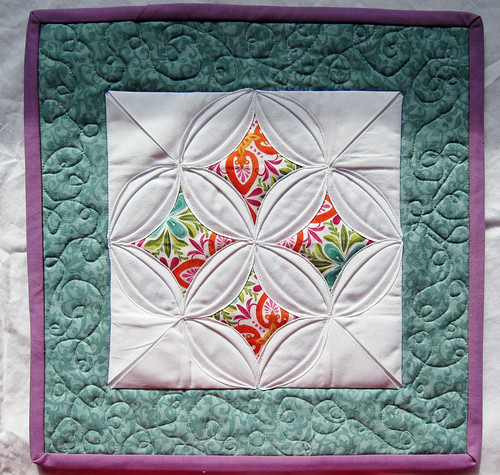
If all else fails, put it near some gorgeous models.

Share this post
Comments (6)
Great idea! I've returned to quilting after a >20 year absence and find I'm obsessed with the idea of a Cathedral Windows quilt. This is a good way to practice, and more useful than a pillow.
Posted by Elle | December 2, 2011 6:07 PM
Posted on December 2, 2011 18:07
Your quilt is beautiful! I am a quilter too, all self taught, once you know the basics, it's not hard at at all, I learned everything online myself, and books and magazines. You need to start stashing soon if you want to be a considered a real quilter! LOL
Posted by Beth Aalberts | December 2, 2011 3:18 PM
Posted on December 2, 2011 15:18
Not my favourite quilt block, but I love the way you've pared it down. And Darwin looks like such a baby in these photos - are you regenerating him?
Posted by Freyalyn | November 28, 2011 5:10 AM
Posted on November 28, 2011 05:10
Wow. I'm also a knitter who's been messing around with quilting the past year or so, but cathedral windows? And as a tutorial? You rock.
My only question is this: where's Panda?
Posted by amy | November 27, 2011 9:33 AM
Posted on November 27, 2011 09:33
They look fab!
I was recently trying my hand at freemotion quilting too and found that it was really tricky to tension the size of the stitches. Some of the stitches came out really long and some - very short, which would be ok if there was a pattern to it. But apart from that it looks great.
Posted by Katya | November 27, 2011 2:45 AM
Posted on November 27, 2011 02:45
Wow! Your quilts are very pretty!!! What a great tutorial! I really admire you. I have absolutely no patience for quilting. I tried quilting years ago and I did manage to make a few small wall quilts but that was more than enough cutting and sewing for me. I have a much easier time using yarn and knitting needles. For some reason, sewing machines and I do not get along. I find it kind of funny since my mom used to make her own dresses. I would think sewing would be in my DNA but alas, it is not.
Posted by Samantha | November 26, 2011 8:44 PM
Posted on November 26, 2011 20:44