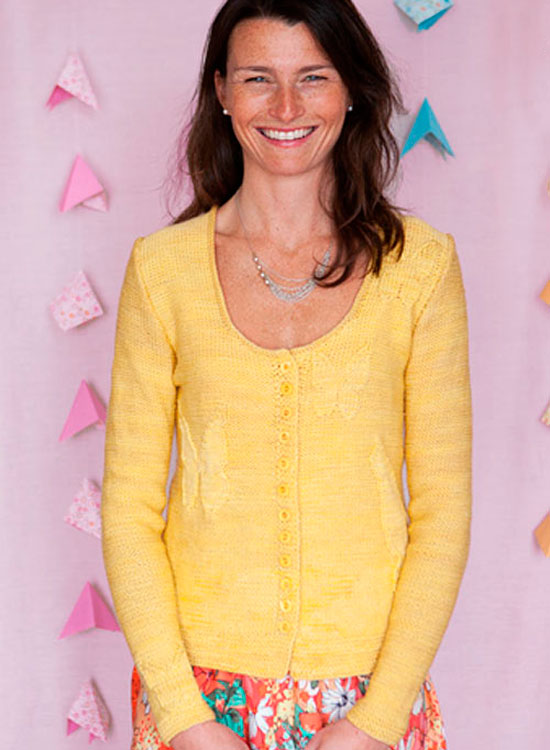
Photo Copyright Jane Heller
I created the original submission for Lyssia, over a year ago so I don't remember what originally led me to the idea, but I do remember grabbing a nice big ball of Cascade 220 superwash and knitting the entire ball of yarn into a swatch.
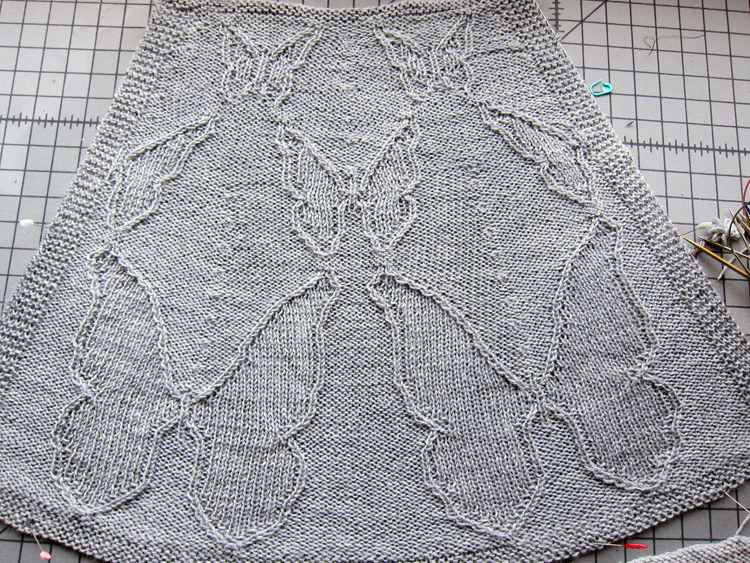
Swatch of unusual size
Actually, I really need to back up a step here, because I didn't just magic those motifs on the needles, they required some pre-planning in Illustrator. Like Deciduous and Cercis, I wanted to create motifs of knit stitches that popped forward on a purl background, but knitting is a bit particular about that. You can stack knit stitches in columns, next to columns of purl stitches and the knits come forward. You see this with ribbing. But what happens when you have horizontal rows of knit stitches between horizontal rows of purl stitches? The knit stitches receed as you see in garter stitch. That means that, for my purposes, stitches could move up and they could move right to left with cable crosses, but I couldn't have perfectly horizontal rows of knit stitches and maintain the bas-relief effect I was going for. And while cable crosses work great for moving stitches side to side, there is a limit to how far you can cross stitches before they begin to pucker and change the gauge of the fabric, so I was limited to crossing no further than 2 stitches over 2 stitches when absolutely needed and I primarily moved stitches only one stitch over, in either directions, to ensure an even fabric. With these limitations in mind, I created the largest motif and then tweaked it to make the two smaller versions.
If you look at the monster swatch above, you may notice, especially with the smaller motifs, that I had originally put purl stitches just inside the outer edge of the motifs. I think it worked OK in the largest motif but really didn't look right in the smaller sizes so the final pattern has only knit stitches filling the motifs.
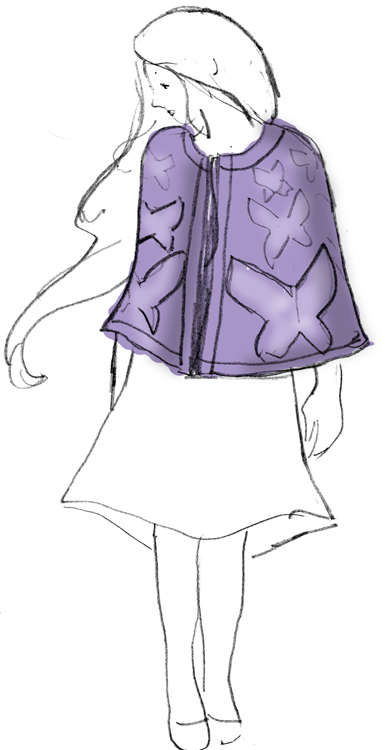
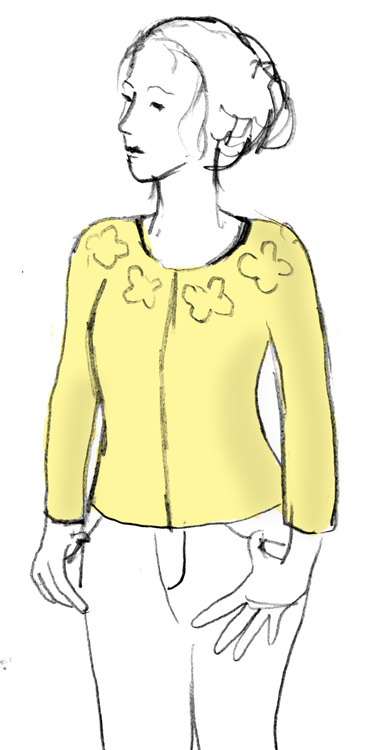
After swatching, I had three ideas for how I could use the motifs. Because the swatch ended up looking like half a cape, when I was done, that ended up being my first inclination. I also imagined using only the smallest motif to create a yoked design.
But the idea I most hoped would be picked up was the third design idea I had, where the motifs would be sprinkled in a seemingly random pattern around the garment.
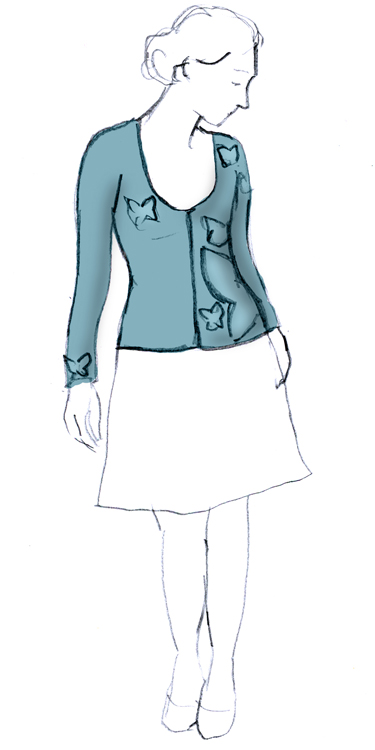
This would be the most challenging of the three designs. I had to make sure that the layout I chose for the butterflies would look uniformly well placed in all sizes, without making the pattern unnecessarily long. Those are the sorts of challenges that keep designing interesting when they don't drive me to drink.
I could have done layouts for each size or range of sizes but instead, I decided to base butterfly placement on way points in the garment. The big butterfly is centered on the side, just above the hem, another motif hits right below the neckline and a few stitches away from the placket, another is centered on the shoulder, next to the front neck. I made a schematic of the largest and smallest size and drew, to-scale outlines of the motifs, so I could see if my plan would look balanced at the two extremes. That sounds like a lot of work, but I ended up using the small version for both a reference graphic in the pattern and as the basis for the schematic, so that little extra effort didn't go to waste.
As fun as all the knitting and designing was, my favorite part has been seeing the projects popping up in ravelry. In the end, that's what designing is really about.
Share this post
Comments (2)
This design is so amazingly original and lovely. Thanks for sharing this. Also, thanks for all of your informative tutorials!
Posted by Carolyn | June 20, 2013 11:42 AM
Posted on June 20, 2013 11:42
Beautiful stitch pattern and stunning sweater!!!
Posted by Lara | June 20, 2013 7:22 AM
Posted on June 20, 2013 07:22